Showing posts with label home. Show all posts

Monday, December 7, 2015

DIY White Woodland Christmas

DIY White Modern Christmas Decorating

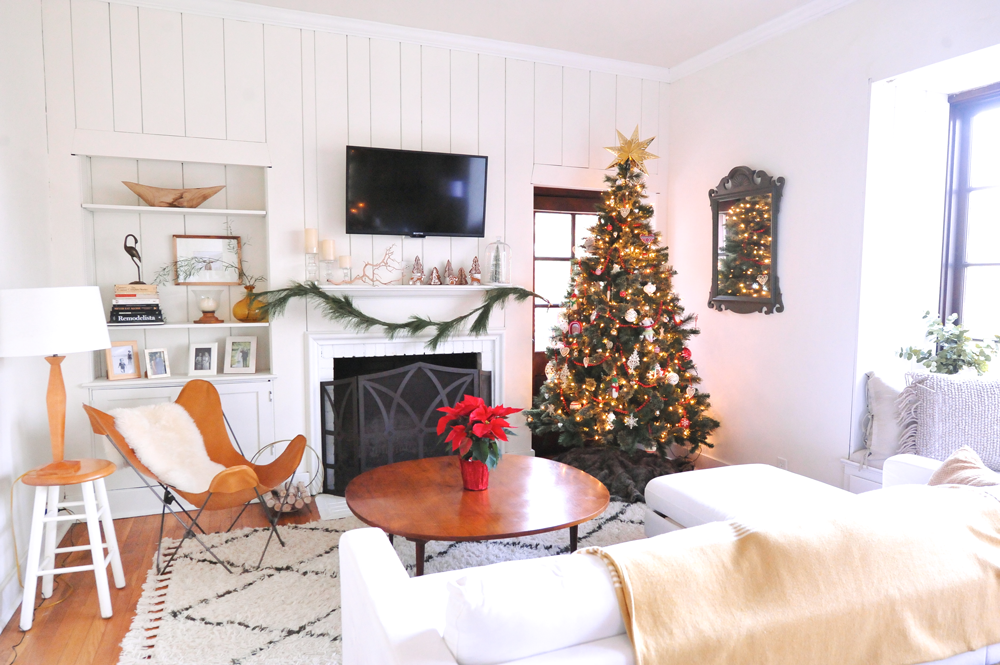
Last Christmas, our living room walls were dark paneled wood. I tried my best to decorate for the holiday and lighten up the mood in the room, but I just couldn't get over how dark and cavernous the dark wood panels made everything feel. It was right after the holiday that we decided to paint the paneling white. And this year, I couldn't wait to decorate our space. Everything came together quite nicely and I went with a white woodland theme. Some of my favorite details include our tiny gingerbread woodland animals on the mantel, cinnamon scented pinecones in the tablescape, and the amazing DIY customizable wall plate from adorne by Legrand on our wall.
DIY White Modern Christmas Decorating
DIY White Modern Christmas Tablescape

To create our tablescape, I used live garland from Trader Joes (cut down to about 5-6 feet), cinnamon scented pinecones from our local grocery store, clementines for color, and a mixture of candlesticks and ivory candles.

 DIY White Modern Christmas Tablescape

DIY White Modern Christmas Mantel

To create the mantel display, I used more of the live garland as a swag and made a gingerbread woodland forest with IKEA DRÖMMAR and Vinter cookie cutters. 

DIY White Modern Christmas Mantel
DIY IKEA Gingerbread Cookies
DIY Custom Holiday Wall Plate adorne by Legrand

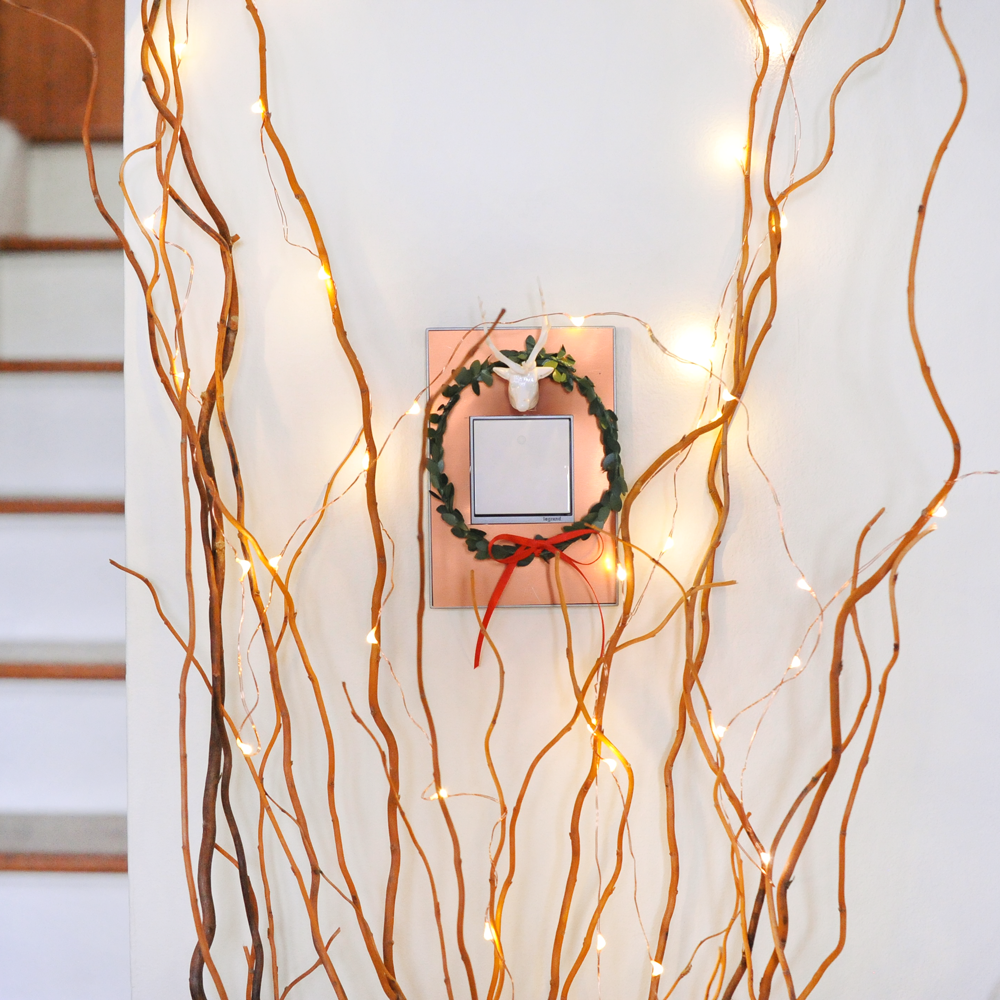
This is the custom wall plate from adorne by Legrand that I decorated using metallic cardstock, boxwood twine, a tiny plastic deer head, and thin red ribbon. It's the perfect addition to our decorations and provides a lot of visual interest to an otherwise empty wall. The coolest thing about it was how easy it was to decorate. Almost all the DIYs I tackle end up taking more time than I anticipate, but designing this wall plate took about a half hour start to finish. Decorating the plate (not the electrical set-up, clearly) would be a great project to do with kids. 

DIY Custom Holiday Wall Plate adorne by Legrand

Click through to see the full DIY and more details! 
DIY Custom Holiday Wall Plate adorne by LegrandDIY Custom Holiday Wall Plate adorne by LegrandDIY Custom Holiday Wall Plate adorne by Legrand

What You'll Need: 

1. Custom Wall Plate, 1-Gang+, Magnesium Trim - adorne by Legrand 
2. 6x6 Metallic Cardstock - Copper Colored - Joann Fabrics
3. Trophy Antlers - Tim Holtz Idea-ology
4. Boxwood Twine - Tim Holtz Idea-ology
5. 1/8" Red Ribbons
6. Glue, Scissors, X-Acto Knife

Instructions:

1. Watch this installation video on using the Custom Wall Plate. It's insanely easy to use with any wallpapers and the copper metallic paper I used was a breeze to install. To cut it to size, I used scissors and an X-Acto knife.
2. Attach the Trophy Antler to the metallic cardstock using a little glue.
3. Cut a 5" strip of Boxwood Twine and twist the ends together.
4. Hang the Boxwood wreath over the deer head.
5. Tie a bow around the bottom of the wreath.
6. That's it! You're done. Hang and enjoy your custom holiday light switch!

* adorne by Legrand provided the light switch and Custom Wall Plate that appears in this post. 

Wednesday, May 20, 2015

Emerson's Nursery Tour

Modern Colorful Baby Girl Nursery Tour Reveal

I am so very excited to share Emerson's nursery. This room was months in the making and quickly became my favorite room in our house. It was so fun creating a space with a little one in mind and I LOVED experimenting with playful feminine accents and colors while still maintaining the peaceful and minimal aesthetic we have come to love. We splurged on a few items, but this room is filled with DIY projects that started with, "Oh I LOVE that shelf...but it's $400... Rich, we can make that, right?" 

Modern Colorful Baby Girl Nursery | Oeuf Bookshelf

In addition to all the DIYs, many items were given to us by generous friends and family. The Steiff Animals were lent from Rich's mom, who played with them when she was a child. And my sister-in-law Chelle made these adorable moccasins for Emmi and gifted them to us for our baby shower. I can't wait until her little feet fit into them. Until then, they hold a special place on her bookshelf. 

Modern Colorful Baby Girl Nursery | Kilim Rug + Mocassins
Modern Colorful Baby Girl Nursery
See our entire nursery reveal and sources after the jump!


Modern Colorful Baby Girl Nursery

Before I was even pregnant, I fell in love with Sharon Montrose's animal prints. The baby deer is a homage to the wildlife that frequent our property. We look forward to bird and animal watching in the backyard as Emerson grows up. The baby giraffe is a nod to the giraffe theme that organically arose as we started gathering nursery pieces. 

Modern Colorful Baby Girl Nursery | Sharon Montrose

We found this vintage Ilmari Tapiovaara rocking chair at a local antique store for a steal. The wood color was a perfect match to the Stokke crib, bookshelf and IKEA dresser, so we snagged it. Draped with sheepskin, it's surprisingly comfortable. And just like the other nursery furniture pieces, this can transition to any room in our house when Emmi outgrows it. 

Modern Colorful Baby Girl Nursery | Ilmari Tapiovaara rocking chair
Modern Colorful Baby Girl Nursery | Wooden Mobile

The Stokke Sleepi Crib was on our radar for quite some time and I love the fact that it can transition from bassinet to crib to toddler bed. The bassinet is perfectly sized for Emerson. She would be swimming in the full-sized crib and I like thinking she's more cozy. 

Modern Colorful Baby Girl Nursery | Stokke Sleepi CribModern Colorful Baby Girl Nursery

Emmi's closet is outfitted with this awesome colorful cube storage made by Rich (check out the DIY here). Having extra storage for things like diapers, wipes, blankets, etc. has made a really big difference in keeping me feeling organized. 

Modern Colorful Baby Girl Nursery | Cube Storage
Modern Colorful Baby Girl Nursery | Oeuf Bookcase
Modern Colorful Baby Girl Nursery
Modern Colorful Baby Girl Nursery | DIY Beaded Pendant

The dresser is an IKEA hack of the TARVA 6-drawer chest painted white with CabinetCoat paint, stained with Minwax Wood Finish in Ipswich Pine 221, and outfitted with new tapered legs.

Modern Colorful Baby Girl Nursery | DIY Ikea Tarva Hack

DIY Changing Pad Cover // DIY Colorful Cube Storage // DIY Circle Wood Shelf // DIY Beaded Pendant Light // Stokke Sleepi Crib // Oeuf Mini Library // Vintage Steiff Animals // Molecule Building Set via Ferm Living // Matilda Sheer Curtains via IKEA // Sannolikt Curtain rod set via IKEA // Round mirror via Homegoods // Antique rug via Etsy //  Baby Mobile // TARVA 6-drawer dresser via IKEA //  Holtztiger Wooden Animals // Sheepskin Rens via IKEA // Braided Pouf via DwellStudio // Baby Animal Prints via The Animal Print Shop

I tried to include the sources for as many details of our nursery as possible, but if you have ANY questions about something in Emerson's room, ask me in the comments! 

Monday, April 13, 2015

DIY Colorful Cubes | Nursery Closet Organization


DIY Cube Closet Storage Organizer

DIY Cube Nursery Closet Storage Organizer

Our nursery is the smallest room in our house, so one of the biggest goals of this space was to maximize every square inch to handle the onslaught of baby gear, toys, and clothes. I really wanted to create storage areas that look awesome and are highly functional (I often sacrifice functionality for form). So we started with adding additional storage to the closet.

Closets are such an easy-to-overlook space and ours get disorganized quickly. I'm positive once the baby arrives this closet will get messy and my perfectly styled space won't be photograph-worthy. But for now, I get to relish the order and pristine nature of the nursery and smile every time I peek in at this little space.

DIY Cube Nursery Closet Storage Organizer

We started this project by finding these 6-cube organizers on Amazon. When we measured the closet, we discovered that two organizers placed side-by-side would fit perfectly in the space (that never happens, so we were psyched!). If these organizers don't happen to fit your space, you could check out Ikea's shelving storage options for this project as well. 

After assembling the cube organizers and placing them inside the closet, I started looking for affordable cube bins and fell in love with all the Land of Nod choices, but didn't love the idea of spending over $150 for 12 bins. So I found these on Amazon ($6.29 for 2 green bins) and came up with the idea to add new front panels.

DIY Cube Nursery Closet Storage Organizer

Get the rest of the DIY details and sources after the jump...

Rich spearheaded this DIY, but I'm going to do my best of outlining how he did it. To start, he cut 11"x 11" squares from a 2'x 4' piece of 1/4" thick Aspen board and used a 1" Forstner bit to put a hole at the top. He sanded the faces and using e6000 craft glue, glued the square boards to the bin faces and clamped them together to dry for around 24 hours.

Once completely dry, he primed the boards with shellac primer and painted 10 out of the 12 faces with colors from paint samples we bought at the local hardware store. We decided to leave two of the 12 as unfinished wood because we liked the look. The color palette of the paint we used is listed below.

DIY Cube Nursery Closet Storage Organizer

Cube Color Palette: Adobe White // Scarborough // Frosty Pine // Turquoise Mist // Pineapple Mousse // Indian Maize // Tuscan Pink // Restful Rose // Orange Vermillion

What I love most about this project is that it doesn't have a strictly nursery feel and can evolve with our little gal's style. And heck, if she doesn't want in her room at some point, I will gladly take it in ours.

DIY Cube Nursery Closet Storage Organizer

DIY Cube Nursery Closet Storage Organizer

What do you think? Pretty adorable, huh? I may have missed a few details of this DIY seeing as how Rich really did the majority of the DIY'ing, so please be sure to leave any questions in the comments and I'll get back to you right away :)

closetmaid 6-cube organizers (2) // soft cube bins (12) // 2'x4' 1/4" aspen board // 1" fornester drill bit // e6000 glue 

Sunday, April 5, 2015

DIY Circle Wood Shelf

DIY Circle Wood Shelf

I've had my eyes on the round dorm shelf from Ferm Living for quite some time and have seen more and more circular wall shelves popping up again and again in stylish spaces I drool over. The price tags on most of these gorgeous shelves is hefty and way out of our budget, so I took the liberty of creating a budget-friendly version that retained the modern minimal look of the originals without breaking the bank.

DIY Circle Wood Shelf Tutorial

One of the most challenging problems was where to find large circular wood pieces that didn't require a carpenter's know-how of bending wood. When I can't think up a solution (or Google a solution) to a DIY problem, I'll just go to a local craft or home improvement store and wander the aisles until a material stands out. This is the approach I took with the round wood circle and I found my answer in the quilting aisle... 23" round quilting hoops.

I couldn't use the outside hoop that screwed together since the wood wasn't connected, so I had to rely on the inside hoop that was already a full circle. I picked through the eight hoops they had in-store and picked out three that had similarly-colored wood and lined up evenly.

DIY Circle Wood Shelf Nursery

Get the rest of the DIY details and sources after the jump…

The hardest part of this project was figuring out how to connect the three quilting hoops to create one thick shelf look. Wood glue was the easiest solution and it sands down nicely, so that's what I went with. As you can see below, I put a thin line of wood glue around one layer at a time and carefully set the hoops on top of one another. I used toothpicks and mini clamps to secure the hoops and keep them aligned and bar clamps to keep pressure on the glue.

DIY Circle Wood Shelf Tutorial

Here you can see the whole crazy clamping process in action. It was not pretty, but it did the job and those suckers lined up perfectly and did not move an inch after 8-10 hours of dry time. 

DIY Circle Wood Shelf Tutorial

Once the clamping process was finished, I set to work on sanding down the glue and imperfections on the hoops. I started with a coarser grit sandpaper, working my way down to a very fine sandpaper to finish. 

DIY Circle Wood Shelf Tutorial

After the hoops were completely sanded and smooth, I cut the basswood sheets to size. Since they're so thin, you could use an X-ACTO knife, but in order to get a super straight cut, I asked Rich to cut them on the saw. Then, using E6000 glue, I attached the sides to the inside of the hoop and placed it upright vertically to fully dry. 

DIY Circle Wood Shelf Tutorial

Lastly, once everything was dried and secure, we drilled two small holes into the upper right and left hand sides of the hoops (through the center hoop) and strung leather lace through it, making secure and tight knots underneath the hoop. I used suede leather lace in a color called Toast. I really liked that it didn't too darkly contrast the unfinished wood look. 

DIY Circle Wood Shelf Nursery

And here is the finished shelf in the nursery. I think it looks so sweet with those little wooden Holtztiger animals. I can't wait to regularly mix and match other keepsakes to mix up decorations. I was, and still am, a little worried about having it hanging right above where we have the changing pad, but I think we'll see how it goes since the depth is pretty shallow and doesn't move too much.

What do you think? I think this circular shelf would look so amazing in a bedroom, bathroom or hallway and am considering making another one.

23" Quilting Hoops // Basswood 24" Sheets // 3/4" Mini Clamps // Steel Bar Clamp // Leather Suede Lace in Toast // Elmer's Wood Glue // E6000 Craft Glue // Holtztiger Wooden Animals // DIY Changing Pad Cover

Sunday, February 8, 2015

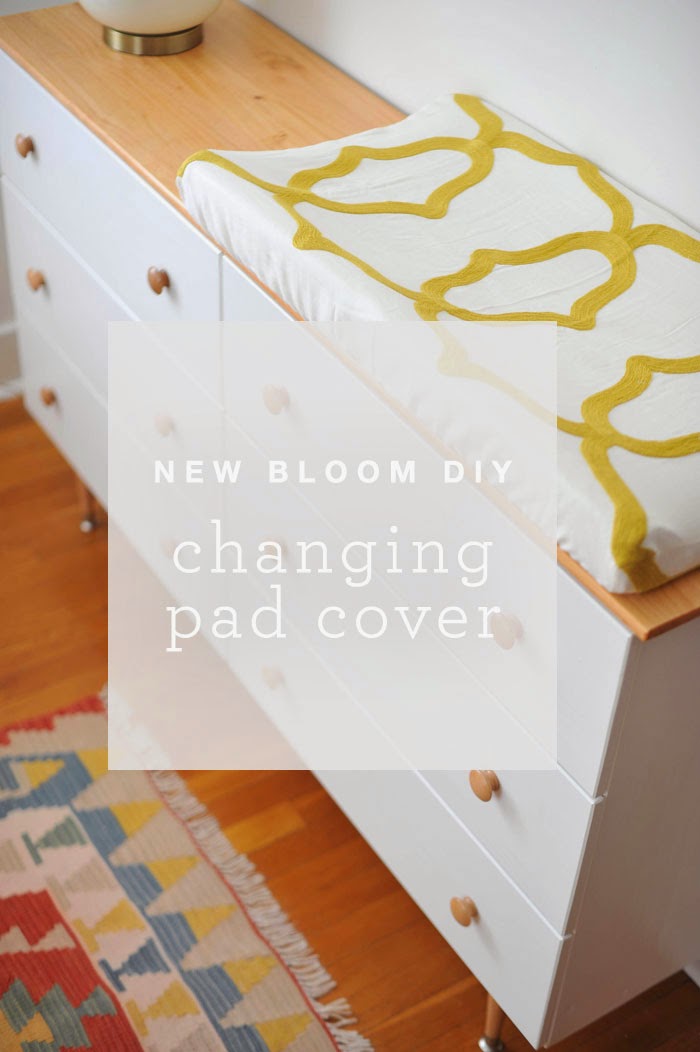
DIY Changing Pad Cover

DIY Modern Boho Changing Pad Cover Tutorial

My DIY inspiration usually arises after trying to take on a new project, looking high and low for good tutorials, and having a hard time finding what I'm looking for. At that point, I'll just wing it. And if the project turns out well, I share it with you all.

Putting together our little one's nursery has been one of my favorite projects to date. I've really loved exploring new colorful decor styles and incorporate a soft feminine vibe into the space without going over-the-top girly. I couldn't find a changing pad cover for sale that had the modern boho vibe I'm going for. So when I came across embroidered mustard yellow curtain panels on clearance at Target, I thought it may look awesome on a changing pad. Here's how I did it...

If you're using a curtain panel, trim off the extra fabric (you'll have a lot, so you can definitely repurpose it for another project). I measured the width to be around 40". 
DIY Modern Boho Changing Pad Cover Tutorial Sewing

Measure the length of the changing pad and give 1-2" of allowance for seams. Pin the edges and cut a straight line, trying to keep the cut as clean as possible. It's okay if it's not perfect, you're going to sew these edges back together anyways. 

DIY Modern Boho Changing Pad Cover Tutorial Sewing

Trace the contoured side pieces of the pad on a manilla folder and allow for 1" seam and 5" extra fabric on the bottom. Cut out the two pieces of fabric you just trimmed from the main piece of fabric with the folder pattern.

DIY Modern Boho Changing Pad Cover Tutorial Sewing

With the fabric turned inside out, pin the two contoured pieces of fabric together, leaving a 1-2" seam for sewing.

DIY Modern Boho Changing Pad Cover Tutorial Sewing

After sewing the contoured pieces and the main fabric together, pin the bottom raw edges. Allow for 1.5" seam so you can slide the elastic piece through easily and don't close the seam as you'll need a small section to insert the band.

DIY Modern Boho Changing Pad Cover Tutorial Sewing

Slide the elastic through the finished edges. Sew the elastic together and finish sewing the bottom edge. And there you have it, put your beautiful new cover on the changing pad and you're good to go. Our next step is figuring out how to safely secure the changing pad to the dresser. 

DIY Modern Boho Changing Pad Cover Tutorial Sewing

WHAT YOU'LL NEED:
Curtain panel or 1.5 yard of fabric (I used this Threshold panel)
~2 yards of 3/4 inch. elastic
Sewing machine
Coordinating thread (I just used standard white)

The nursery still needs work, but I'm really happy with how it's coming together and can't wait to show you the nursery reveal soon.