Showing posts with label DIY. Show all posts

Thursday, February 18, 2016

DIY Modern IKEA Tarva Hack

DIY Modern IKEA Tarva Hack

When I revealed Emerson's nursery a few months back, everyone kept asking how we DIY'ed the IKEA Tarva dresser in her room. So I'm finally getting around to laying out the step-by-step of how we did it!

The thing I really love about the Tarva is that it comes unfinished and is designed to be customized and jazzed up. I've seen several really awesome and inspired creations using the Tarva and I love that IKEA is creating products specifically for people who love customizing furniture.

DIY Modern IKEA Tarva Hack

See the full DIY after the jump!

DIY Modern IKEA Tarva Hack

DIY Modern IKEA Tarva Hack

DIY Modern IKEA Tarva Hack

DIY Modern IKEA Tarva Hack

What You'll Need

5.5" Tapered Legs
Brackets for Legs
Plywood

How We Did It 

1. Assemble the dresser and leave the dresser drawers out. Give it all a light sanding (this isn't totally necessary, but I think the finish is nicer if you do).
2. If you want to use tapered legs, cut a piece of high quality plywood into a 59"X14" rectangle to screw under the dresser. Attach is to the underside of the dresser using screws, placing them approx. every 10 inches.
2. Paint one coat of CabinetCoat paint in Satin White on the dresser sides and drawers. Let it dry for 6-8 hours. 
3. Paint another coat of CabinetCoat paint and let it fully dry/cure 24 hours. 
4. In the meantime, stain the top of the dresser, the knobs and legs with Minwax Natural Wood Finish.
5. Once the wood pieces are the shade you like, cover them with several coats of clear Polyurethane (we used 4 coats), lightly sanding with a fine grit sandpaper in between each coat. 
6. Using the hardware IKEA provides, attach this thing to your wall. Please just do it. ESPECIALLY if you're using in a nursery or have kids.

And here's our nursery tour that has all the sources listed of stuff we used in this room! And as always, let me know of any questions or any future DIY's you'd like to see in the comments!

Monday, December 7, 2015

DIY White Woodland Christmas

DIY White Modern Christmas Decorating

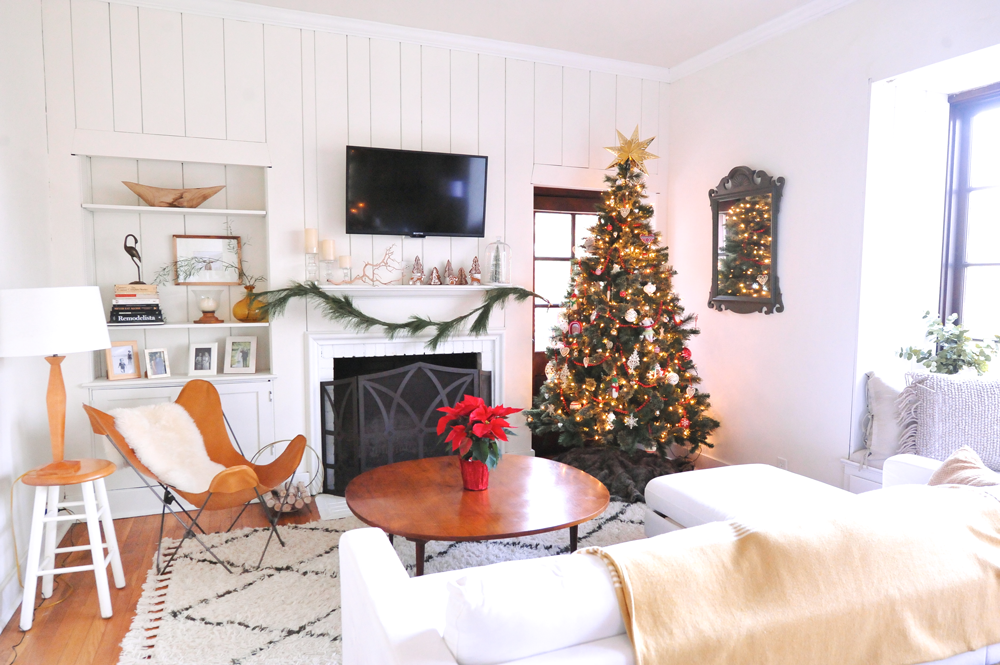
Last Christmas, our living room walls were dark paneled wood. I tried my best to decorate for the holiday and lighten up the mood in the room, but I just couldn't get over how dark and cavernous the dark wood panels made everything feel. It was right after the holiday that we decided to paint the paneling white. And this year, I couldn't wait to decorate our space. Everything came together quite nicely and I went with a white woodland theme. Some of my favorite details include our tiny gingerbread woodland animals on the mantel, cinnamon scented pinecones in the tablescape, and the amazing DIY customizable wall plate from adorne by Legrand on our wall.

DIY White Modern Christmas Decorating
DIY White Modern Christmas Tablescape

To create our tablescape, I used live garland from Trader Joes (cut down to about 5-6 feet), cinnamon scented pinecones from our local grocery store, clementines for color, and a mixture of candlesticks and ivory candles.

 DIY White Modern Christmas Tablescape

DIY White Modern Christmas Mantel

To create the mantel display, I used more of the live garland as a swag and made a gingerbread woodland forest with IKEA DRÖMMAR and Vinter cookie cutters. 

DIY White Modern Christmas Mantel
DIY IKEA Gingerbread Cookies
DIY Custom Holiday Wall Plate adorne by Legrand

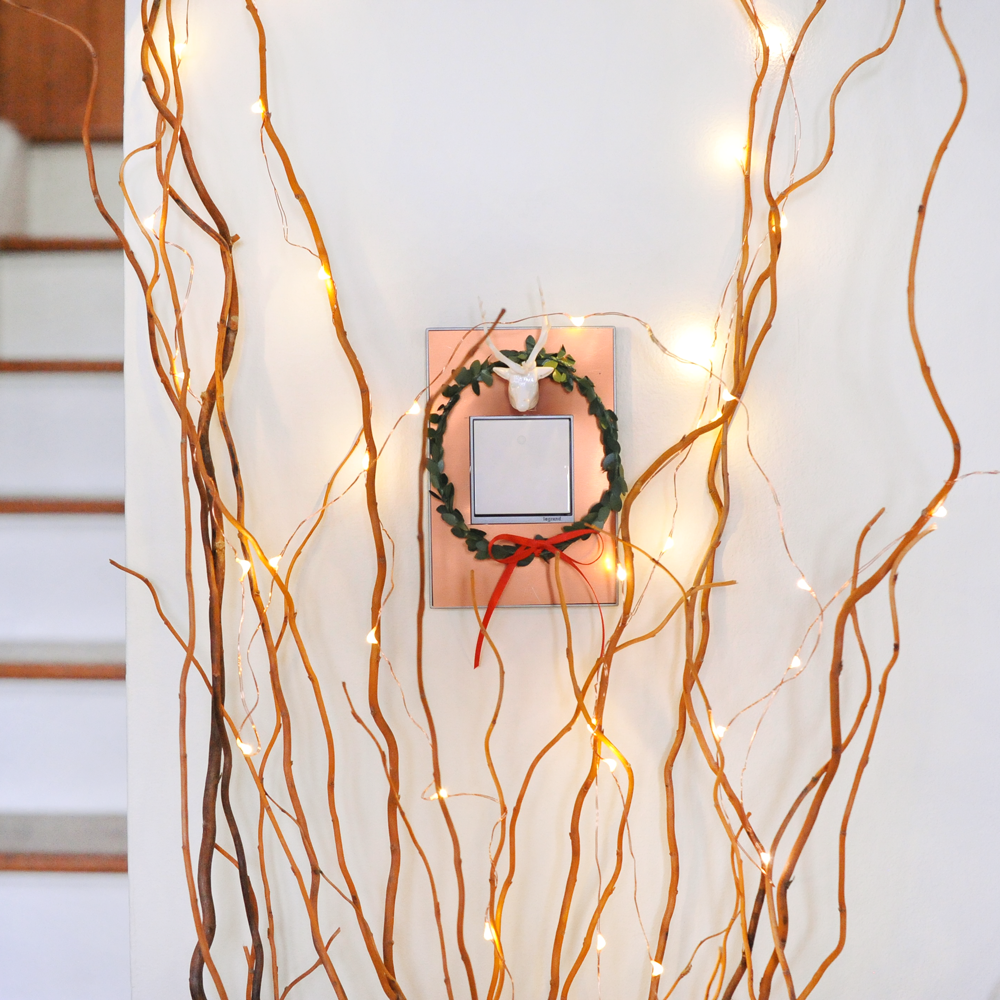
This is the custom wall plate from adorne by Legrand that I decorated using metallic cardstock, boxwood twine, a tiny plastic deer head, and thin red ribbon. It's the perfect addition to our decorations and provides a lot of visual interest to an otherwise empty wall. The coolest thing about it was how easy it was to decorate. Almost all the DIYs I tackle end up taking more time than I anticipate, but designing this wall plate took about a half hour start to finish. Decorating the plate (not the electrical set-up, clearly) would be a great project to do with kids. 

DIY Custom Holiday Wall Plate adorne by Legrand

Click through to see the full DIY and more details! 
DIY Custom Holiday Wall Plate adorne by LegrandDIY Custom Holiday Wall Plate adorne by LegrandDIY Custom Holiday Wall Plate adorne by Legrand

What You'll Need: 

1. Custom Wall Plate, 1-Gang+, Magnesium Trim - adorne by Legrand 
2. 6x6 Metallic Cardstock - Copper Colored - Joann Fabrics
3. Trophy Antlers - Tim Holtz Idea-ology
4. Boxwood Twine - Tim Holtz Idea-ology
5. 1/8" Red Ribbons
6. Glue, Scissors, X-Acto Knife

Instructions:

1. Watch this installation video on using the Custom Wall Plate. It's insanely easy to use with any wallpapers and the copper metallic paper I used was a breeze to install. To cut it to size, I used scissors and an X-Acto knife.
2. Attach the Trophy Antler to the metallic cardstock using a little glue.
3. Cut a 5" strip of Boxwood Twine and twist the ends together.
4. Hang the Boxwood wreath over the deer head.
5. Tie a bow around the bottom of the wreath.
6. That's it! You're done. Hang and enjoy your custom holiday light switch!

* adorne by Legrand provided the light switch and Custom Wall Plate that appears in this post. 

Friday, November 20, 2015

DIY Felt Stockings with Tassels & Poms

DIY Christmas Stocking with Tassels and Pom-poms
When I was a child, decorating for Christmas was a sport. My Grandma (on my dad's side) and my mom would go ALL OUT and transformed both of their homes into seriously magical worlds. My Grandma chose a theme each year and would buy all new decorations to match. One year was a gilded gold with a white tree and my 12-year-old self thought I had walked into Buckingham Palace. My mom's place is always on point, as well. She has serious decorating chops all year round, but Christmas is when she really shines. I always try to sucker her into helping me decorate my place around the holidays. And now that we have Emerson, I'm so looking forward to the magic of holiday decor.

One of my favorite decorating moments was when the Christmas stockings went up on the mantle. They would hang there in eager anticipation waiting to be filled and all throughout December I would check mine to see if anything had arrived early.

So this year, I wanted to make personalized stockings for Emerson, Rich and I. Inspired by the ever-lovely Anthropologie stockings, I decided to go with a yarn tassel and pom-pom look on wool felt. Not only are the results pretty darn cute, but it was much more affordable than anything store-bought.


DIY Christmas Stocking with Tassels and Pom-poms

Click through to see the full DIY after the jump!

DIY Christmas Stocking with Tassels and Pom-poms
DIY Christmas Stocking with Tassels and Pom-poms Embroidered Name
DIY Holiday Christmas Stocking Tassel & Pom-poms Anthropologie
DIY Holiday Christmas Stocking Tassel & Pom-poms

DIY Tassel + Pom-Pom Christmas Stockings

Materials


  • 2.5 Yards of Wool Felt
  • Silver embroidery thread 
  • Gold embroidery thread
  • Yarn for tassels and pom-poms 
  • Scissors 
  • Size 20 Chenille Needle
  • Sewing pins

Instructions

To begin, fold your wool felt in half. Trace a stocking shape on the felt by freehand or using a stocking you already have at home. Cut the shape out, both pieces of felt, so you have the front and back piece.  Use several sewing pins to keep the two felt pieces together (see image below). Using your silver embroidery thread, sew a blanket stitch around the perimeter of the stocking, leaving the top open.

Next, cut a 6" piece of felt for the top flap. Using the tracing paper method, write the name you'd like to embroider on the tracing paper, and secure it to the felt with sewing needs. I used a rope stitch for my letters and it was super easy and quick.

After you finish your name, fold one side up and do a blanket stitch to keep close the bottom. Secure it to the stocking with a blanket stitch on either side.

Now on to the yarn embellishments. You can definitely go crazy with this part, and feel free to make as many poms or tassels as you want. I bet you can come up with so many cool designs. I found myself trying to hold back on the poms and tassels because it was getting a little crazy. Make three yarn pom-poms in the colors of your choosing. Make two yarn tassels in the colors of your choosing. Secure the poms to the stocking using a needle and thread. Tie the tassels together and attach them to the top looped hook.

DIY Holiday Christmas Stocking Tassel & Pom-poms Instructions

Tuesday, October 20, 2015

Nursery Update: DIY Pom Pom Garland

DIY Pom Pom Garland Nursery

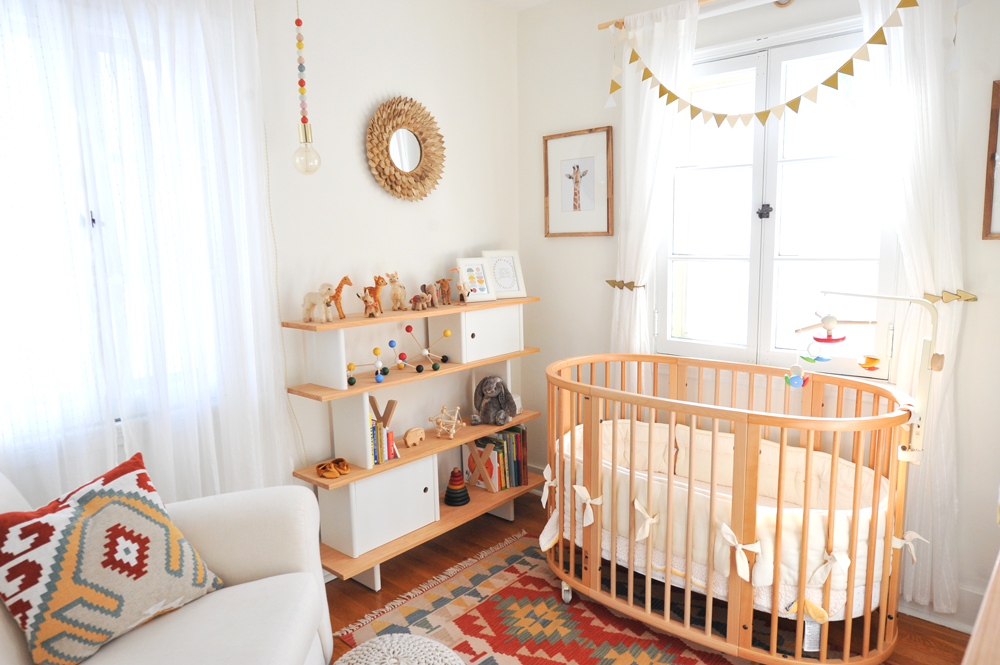
Emerson's nursery is easily my favorite room in our house. The sun streams in her windows the entire day and each time I walk in, or walk by, I am struck with how much this space feels like hers. It's ethereal, warm, modern and so lively.

I originally had this round wooden shelf above her changing pad. And even though I loved it in this spot, E's little hands quickly started grabbing for it and pulling the tiny wooden animals down. I realized I needed something out of reach, while still visually interesting for this curious little kitten. So I made this colorful pom garland out of some yarn I had laying around. I also added a tiny circle mirror next to her changing pad, because she would always turn her head and stare at a blank wall, and I wanted to be able to make silly faces and engage with her more.

DIY Pom Pom Garland Nursery Warm Modern

DIY Nursery Sharon Montrose Baby Alpaca
DIY Modern Nursery Pom Pom Garland

DIY Modern Nursery Pom Pom Garland

DIY Modern Nursery Pom Pom Garland

DIY Modern Nursery Pom Pom Garland

DIY Pom Pom Garland


I used this fork method to make 20 pom poms. After they were complete, I cut 20 4-5" pieces of ivory yarn and attached it to the top of all the poms. Then, I knotted the ivory yarn to a (48") piece of ivory yarn. I attached it to the wall using these clear plastic removable hooks.

Nursery Sources:

DIY Changing Pad Cover
IKEA Shelf 
DIY Wooden Blocks
Vintage YoYo Harlequin Clown Doll
Natural Rattle and Teether
Baby Animal Prints by Sharon Montrose
*Let me know in the comments if you have any questions about E's nursery that I haven't answered!

Monday, October 5, 2015

DIY Tea Dyed Onesie


Babies grow out of everything SO quickly. I just reluctantly put away all of Emerson's 0-3 month summer clothes and was so sad to see a physical representation of time passing.

One staple of E's wardrobe has been these white onesies. I'll buy a pack of them on Amazon and in the warm weather, let her wear them around the house. In the colder season, I layer them underneath her outfits for extra warmth. They're so inexpensive that I don't mind them getting trashed with spit up or blow outs. In fact, one time, her blow out was so bad that I literally just cut the onesie off her body and threw it in the trash to avoid major clean up.

As I bought onesies for winter, I had the urge to spruce them up a bit. And when I saw this DIY via Moonologie, I knew it was the perfect organic fix.


Click to see the DIY after the jump! 


DIY Tea Dyed Onesie

What you'll need
White Onesies
Box of tea (I used Lady Lipton's Black Tea with Bergamot and Citrus)
1/4 cup white wine vinegar
1 tsp salt
Large pot
Wooden spatula

Directions
Prewash the white onesies in baby detergent. Remove from the washer and don't dry them.

Boil a big pot of water, enough for at least 2 inches of water to cover the submerged onesies. Once the water is boiling, drape 15 tea bags over the edges and let sit for 2 minutes. Turn off the heat and let the tea seep for another 15 minutes. Remove the tea bags and stir the water around to make sure the coloring is consistent. Place the onesies in the tea and push to the bottom of the pot with a wooden spatula, making sure all the fabric is submerged. Let sit for 45 minutes to 1 hour, stirring every 15 minutes. You can leave the onesie in the tea for longer if you want a darker color.

Drain the water, leaving the onesies in the pot. Fill it back up with lukewarm water and 1/4 cup of white wine vinegar and 1 tsp salt. Stir around with wooden spatula and let sit for 15-20 minutes to "seal" the color in the fibers of the cotton. Drain the water from the pot and run the onesies gently under lukewarm water, ringing them to get the vinegar and tea smell out. Hang dry or put in the dryer on gentle cycle.

Once dry, gently iron on low to even further seal the color. Then run through a normal laundry cycle with baby detergent before putting on your babe.

If you aren't happy with the color upon the first drying, you can put it back in tea for a longer period of time, or use bleach to lighten it up.


Friday, August 21, 2015

7 DIY Wood Projects I Love

Summer is almost coming to an end (gah- how is that possible?!) which means the end of lengthy-lit days with warm sunshine. Summer days are so perfect for doing DIY projects- you can paint, stain, glue, or sand wooden projects outside and let them dry under the hot sun.

So get out there and make something awesome that you can admire when you're hibernating indoors this winter. Here are 7 project suggestions (and a few of my favorite past DIYs) if you're wondering where to start.

01. Wooden Bead Pendant Light
02. Colorful Cube Organization
03. Modern Computer Monitor Stand
04. Modern IKEA Hack Vanity
05. Circle Wood Shelf
06. Wooden Key Holder
07. Reclaimed Wood Dining Table

Wednesday, August 5, 2015

THE KITCHEN- An Update

Kitchen DIY Update |  adorne by legrand

As anyone who has ever done a DIY project knows, the devil is in the details. And after renovating our kitchen last year, we knew we had a few really important details to tackle before we could mark off this project as complete.

Some of those details were our light switches and outlets. Our house is over 80 years old, and had some seriously outdated looks going on that took away from the beauty of our new white subway tile, butcher block countertops, and freshly painted white walls. So when Legrand reached out and graciously hooked us up with new outlets and plates from their adorne collection, we jumped at the opportunity. And we couldn't believe the difference it made in the overall look and functionality of our kitchen space. 

Kitchen DIY Update |  USB adorne by legrand

That USB outlet above is a small but MIGHTY improvement. Doesn't it always seem like your iPad hits 1% battery life when you get to the most important detail of any recipe? (I know, that is the ultimate first world problem.) But now I can keep my iPad or phone plugged in as I cook and bake. 

On the white subway tiled backsplashes, we have Mirror White wall plates. They look so seamless and really make the pattern and grout pop. I was worried it wouldn't match perfectly, but it does and looks SO GOOD.

Kitchen DIY Update |  adorne by legrand

The beauty below is the Wave Switch. You literally just wave your hand in front of it to turn the light on and off. Right after installing it, I stood there for a good 10 minutes just waving the light on and off for the fun of it.  And everyone who comes by is obsessed with it, as well. It's our new party trick.

Having it right next to the sink and area where I do food prep is so key. My hands can be all wet, grimy, and covered in flour and the switch stays beautiful and crumb-free. 

Kitchen DIY Update |  adorne by legrand

The light switch you see in the photo below is the Whisper Dimmer with a French Oak wall plate. Oh boy, is that plate stunning or what? The light wood looks so good with our butcher block and warm wood accents. Instead of falling into the background, the light switch is an artful accent and another opportunity to reinforce the modern aesthetic we've come to love. 

Kitchen DIY Update |  adorne by legrand

And there's that beautiful French Oak plate again! On the back wall, we have two paddle switches and a nightlight. The whole set looks so perfect with our Bamboo blinds and natural modern decor.

Kitchen DIY Update |  adorne by legrand

Click through to see the "before and after" shots!

Kitchen DIY Before & After |  adorne by legrand
Kitchen DIY Lighting |  adorne by legrand

If you're curious about the products we have in our kitchen, all of the sources are listed below! Installation questions? Legrand's site is a wealth of knowledge of and resources for DIY'ing this project. And a huge THANK YOU to Legrand for providing us with the materials for this kitchen upgrade.

Front and Back Walls:
French Oak wall plates
Whisper Dimmer
Paddle Switches
Nightlight

White Subway Tile Backsplashes:
Mirror White wall plates
Pop out outlet
Wave Switch
Tamper-resistant outlet
Tamper-resistant GFCI outlet