Showing posts with label decor. Show all posts

Thursday, February 18, 2016

DIY Modern IKEA Tarva Hack

DIY Modern IKEA Tarva Hack

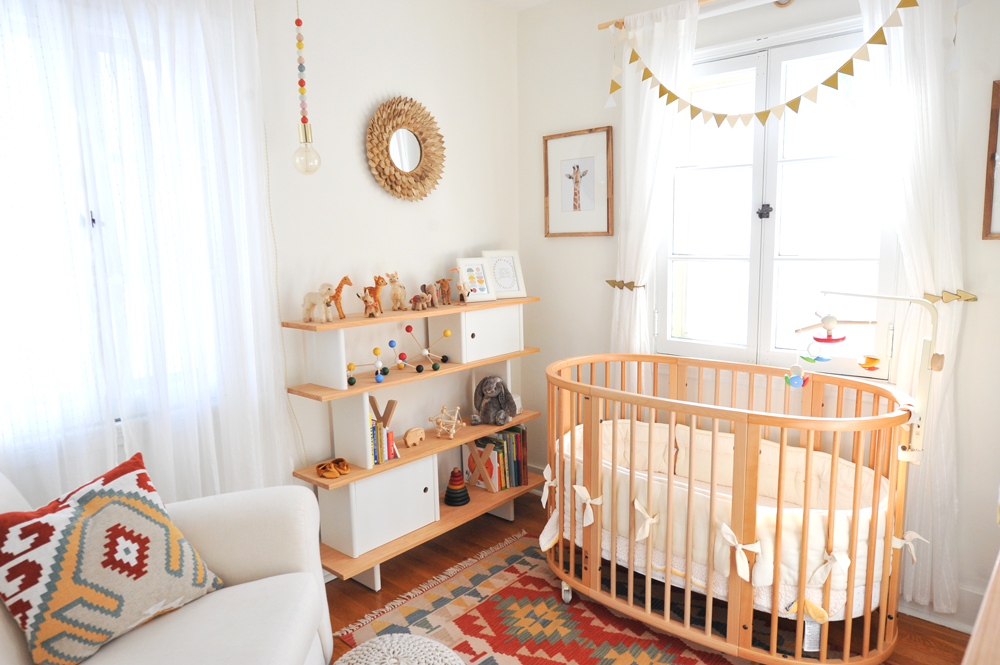
When I revealed Emerson's nursery a few months back, everyone kept asking how we DIY'ed the IKEA Tarva dresser in her room. So I'm finally getting around to laying out the step-by-step of how we did it!

The thing I really love about the Tarva is that it comes unfinished and is designed to be customized and jazzed up. I've seen several really awesome and inspired creations using the Tarva and I love that IKEA is creating products specifically for people who love customizing furniture.

DIY Modern IKEA Tarva Hack

See the full DIY after the jump!

DIY Modern IKEA Tarva Hack

DIY Modern IKEA Tarva Hack

DIY Modern IKEA Tarva Hack

DIY Modern IKEA Tarva Hack

What You'll Need

5.5" Tapered Legs
Brackets for Legs
Plywood

How We Did It 

1. Assemble the dresser and leave the dresser drawers out. Give it all a light sanding (this isn't totally necessary, but I think the finish is nicer if you do).
2. If you want to use tapered legs, cut a piece of high quality plywood into a 59"X14" rectangle to screw under the dresser. Attach is to the underside of the dresser using screws, placing them approx. every 10 inches.
2. Paint one coat of CabinetCoat paint in Satin White on the dresser sides and drawers. Let it dry for 6-8 hours. 
3. Paint another coat of CabinetCoat paint and let it fully dry/cure 24 hours. 
4. In the meantime, stain the top of the dresser, the knobs and legs with Minwax Natural Wood Finish.
5. Once the wood pieces are the shade you like, cover them with several coats of clear Polyurethane (we used 4 coats), lightly sanding with a fine grit sandpaper in between each coat. 
6. Using the hardware IKEA provides, attach this thing to your wall. Please just do it. ESPECIALLY if you're using in a nursery or have kids.

And here's our nursery tour that has all the sources listed of stuff we used in this room! And as always, let me know of any questions or any future DIY's you'd like to see in the comments!

Sunday, April 5, 2015

DIY Circle Wood Shelf

DIY Circle Wood Shelf

I've had my eyes on the round dorm shelf from Ferm Living for quite some time and have seen more and more circular wall shelves popping up again and again in stylish spaces I drool over. The price tags on most of these gorgeous shelves is hefty and way out of our budget, so I took the liberty of creating a budget-friendly version that retained the modern minimal look of the originals without breaking the bank.

DIY Circle Wood Shelf Tutorial

One of the most challenging problems was where to find large circular wood pieces that didn't require a carpenter's know-how of bending wood. When I can't think up a solution (or Google a solution) to a DIY problem, I'll just go to a local craft or home improvement store and wander the aisles until a material stands out. This is the approach I took with the round wood circle and I found my answer in the quilting aisle... 23" round quilting hoops.

I couldn't use the outside hoop that screwed together since the wood wasn't connected, so I had to rely on the inside hoop that was already a full circle. I picked through the eight hoops they had in-store and picked out three that had similarly-colored wood and lined up evenly.

DIY Circle Wood Shelf Nursery

Get the rest of the DIY details and sources after the jump…

The hardest part of this project was figuring out how to connect the three quilting hoops to create one thick shelf look. Wood glue was the easiest solution and it sands down nicely, so that's what I went with. As you can see below, I put a thin line of wood glue around one layer at a time and carefully set the hoops on top of one another. I used toothpicks and mini clamps to secure the hoops and keep them aligned and bar clamps to keep pressure on the glue.

DIY Circle Wood Shelf Tutorial

Here you can see the whole crazy clamping process in action. It was not pretty, but it did the job and those suckers lined up perfectly and did not move an inch after 8-10 hours of dry time. 

DIY Circle Wood Shelf Tutorial

Once the clamping process was finished, I set to work on sanding down the glue and imperfections on the hoops. I started with a coarser grit sandpaper, working my way down to a very fine sandpaper to finish. 

DIY Circle Wood Shelf Tutorial

After the hoops were completely sanded and smooth, I cut the basswood sheets to size. Since they're so thin, you could use an X-ACTO knife, but in order to get a super straight cut, I asked Rich to cut them on the saw. Then, using E6000 glue, I attached the sides to the inside of the hoop and placed it upright vertically to fully dry. 

DIY Circle Wood Shelf Tutorial

Lastly, once everything was dried and secure, we drilled two small holes into the upper right and left hand sides of the hoops (through the center hoop) and strung leather lace through it, making secure and tight knots underneath the hoop. I used suede leather lace in a color called Toast. I really liked that it didn't too darkly contrast the unfinished wood look. 

DIY Circle Wood Shelf Nursery

And here is the finished shelf in the nursery. I think it looks so sweet with those little wooden Holtztiger animals. I can't wait to regularly mix and match other keepsakes to mix up decorations. I was, and still am, a little worried about having it hanging right above where we have the changing pad, but I think we'll see how it goes since the depth is pretty shallow and doesn't move too much.

What do you think? I think this circular shelf would look so amazing in a bedroom, bathroom or hallway and am considering making another one.

23" Quilting Hoops // Basswood 24" Sheets // 3/4" Mini Clamps // Steel Bar Clamp // Leather Suede Lace in Toast // Elmer's Wood Glue // E6000 Craft Glue // Holtztiger Wooden Animals // DIY Changing Pad Cover

Sunday, March 22, 2015

DIY Wooden Bead Pendant Light

DIY Wooden Bead Pendant Light Modern Nursery

With a little over a month to go until our babe arrives, we have finally entered the finishing touches stage of the nursery project. From the very beginning, I started scoping out ridiculous amount of nursery inspiration. And I kept coming back to the brilliant simplistic and modern styling of Sharon Montrose's Animal Print Shop nurseries. Her baby alpaca nursery, and this pendant light, are just so spot on.

So I set out to recreate a DIY version of this pendant light using wooden beads, twisted cloth covered wire, and a vintage light bulb. Aside from the electrical assembly, which did take a couple hours, this project was simple with big payoff in terms of bringing color and whimsy to the nursery.

DIY Wooden Bead Pendant Light Materials
DIY Wooden Bead Pendant Light
DIY Wooden Bead Pendant Light | Modern Nursery

Get the rest of the DIY details and sources after the jump…


Supplies needed:

15-20 Round Wooden Beads
Paint samples of desired bead colors
16' of Ivory Twisted Cloth Covered Wire
Grounded Porcelain Socket
Gold Flat Top Metal Socket Cover
Vintage Round 40 Watt Light Bulb
15-Amp 25-Volt White 2-Wire Plug
Electrical Tape
Drill

To start, drill 1/4" holes in 15-20 wooden beads. I bought beads that already had holes, but they weren't big enough to string the covered wire through, so we needed to expand them.

Pick 6-7 of your favorite paint colors and buy samples from your local hardware store. Using long toothpicks or skewers, place wooden beads on sticks and paint. I did 2-3 coats for each color, letting each dry for 20-30 minutes between coats.

For the electrical assembly side of things, we followed the Color Cord Company's video tutorials.

DIY Wooden Bead Pendant Light Tutorial

DIY Wooden Bead Pendant Light Tutorial

DIY Wooden Bead Pendant Light Tutorial

DIY Wooden Bead Pendant Light Tutorial

DIY Wooden Bead Pendant Light Tutorial
DIY Wooden Bead Pendant Light | Modern Nursery


We still have a few finals details to tackle before we can say the nursery is complete, but we are SO close and I can't wait to share the entire room with you soon.

What do you think? I feel like this wooden bead pendant light can be repurposed (with some colors adjusted...or not!) and used in any room in the house. I kind of want one in our bedroom now.

Oeuf Mini Library // Vintage Steiff Animals // Molecule Building Set via Ferm Living // Matilda Sheer Curtains via IKEA // Sannolikt Curtain rod set via IKEA // Round mirror via Homegoods

Sunday, February 8, 2015

DIY Changing Pad Cover

DIY Modern Boho Changing Pad Cover Tutorial

My DIY inspiration usually arises after trying to take on a new project, looking high and low for good tutorials, and having a hard time finding what I'm looking for. At that point, I'll just wing it. And if the project turns out well, I share it with you all.

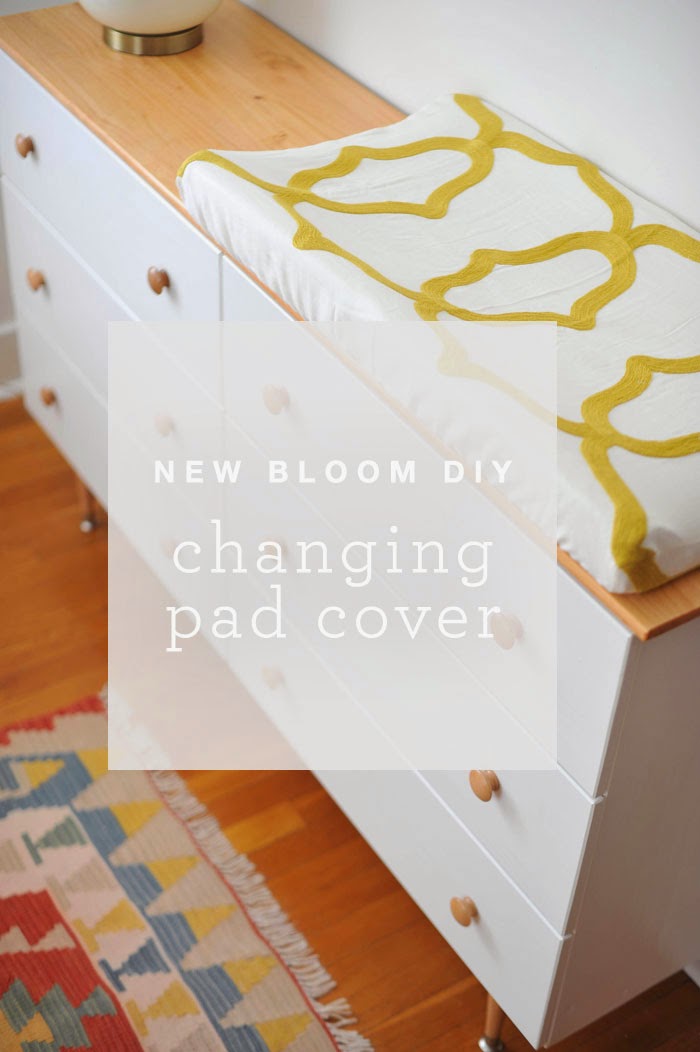
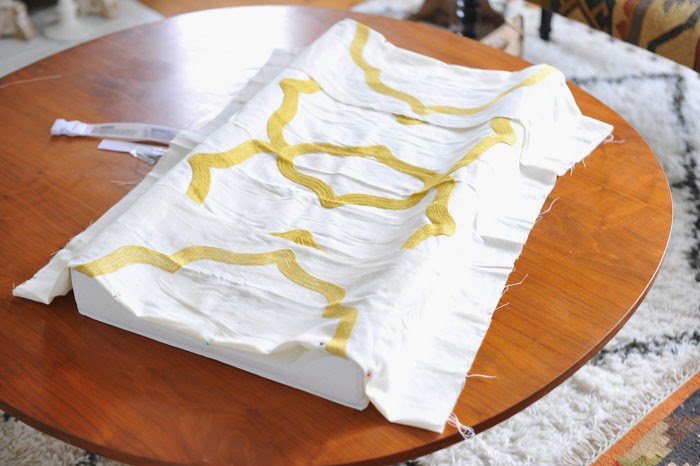
Putting together our little one's nursery has been one of my favorite projects to date. I've really loved exploring new colorful decor styles and incorporate a soft feminine vibe into the space without going over-the-top girly. I couldn't find a changing pad cover for sale that had the modern boho vibe I'm going for. So when I came across embroidered mustard yellow curtain panels on clearance at Target, I thought it may look awesome on a changing pad. Here's how I did it...

If you're using a curtain panel, trim off the extra fabric (you'll have a lot, so you can definitely repurpose it for another project). I measured the width to be around 40". 
DIY Modern Boho Changing Pad Cover Tutorial Sewing

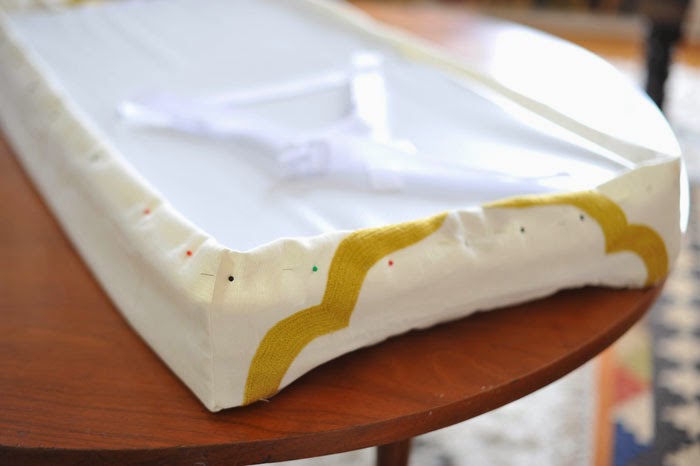
Measure the length of the changing pad and give 1-2" of allowance for seams. Pin the edges and cut a straight line, trying to keep the cut as clean as possible. It's okay if it's not perfect, you're going to sew these edges back together anyways. 

DIY Modern Boho Changing Pad Cover Tutorial Sewing

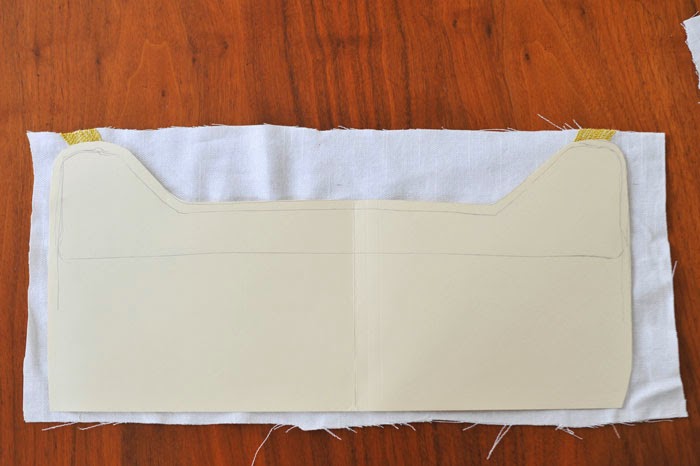
Trace the contoured side pieces of the pad on a manilla folder and allow for 1" seam and 5" extra fabric on the bottom. Cut out the two pieces of fabric you just trimmed from the main piece of fabric with the folder pattern.

DIY Modern Boho Changing Pad Cover Tutorial Sewing

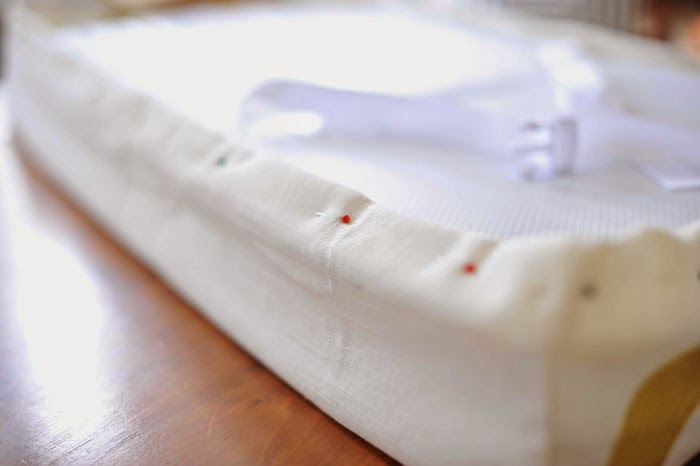
With the fabric turned inside out, pin the two contoured pieces of fabric together, leaving a 1-2" seam for sewing.

DIY Modern Boho Changing Pad Cover Tutorial Sewing

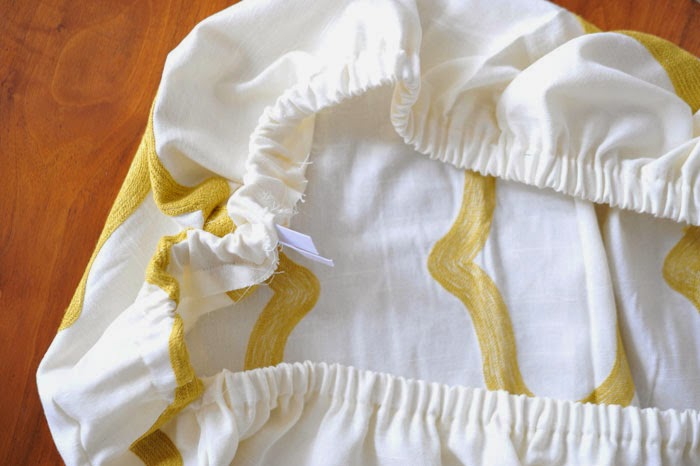
After sewing the contoured pieces and the main fabric together, pin the bottom raw edges. Allow for 1.5" seam so you can slide the elastic piece through easily and don't close the seam as you'll need a small section to insert the band.

DIY Modern Boho Changing Pad Cover Tutorial Sewing

Slide the elastic through the finished edges. Sew the elastic together and finish sewing the bottom edge. And there you have it, put your beautiful new cover on the changing pad and you're good to go. Our next step is figuring out how to safely secure the changing pad to the dresser. 

DIY Modern Boho Changing Pad Cover Tutorial Sewing

WHAT YOU'LL NEED:
Curtain panel or 1.5 yard of fabric (I used this Threshold panel)
~2 yards of 3/4 inch. elastic
Sewing machine
Coordinating thread (I just used standard white)

The nursery still needs work, but I'm really happy with how it's coming together and can't wait to show you the nursery reveal soon. 

Sunday, September 14, 2014

DIY Dried Flower Shadow Box + The Best Gift

September 7th of 2013 was the best day of my life. I married my best friend (you can see us in our wedding glory found here). A man that humbles me every day with his grace, kindness and humor. He's a better person than I am. A better person than most every other person I know, in fact.

On the day of our anniversary last Sunday, I was feeling really under the weather. We had just gotten home from a whirlwind weekend in Philadelphia and I crawled into bed and was ready to fall asleep. Rich excitedly comes into the bedroom and says I can't go to bed yet. First, I must open his anniversary gift. So I roll over, pull myself up, and see him smiling on the edge of the bed with a beautifully wrapped (always) box. Before I even open the gift, I felt terrible as I hadn't gotten him something. But, of course, because he's just the best person, wasn't even fazed. I tear open the paper and this unbelievable gem is inside. Rich MADE THIS. Out of the flowers from the boutonniere he wore on our wedding day. Arranged so artfully and carefully placed. It took my breath away and is absolutely the BEST, most meaningful present I've received. That man.

Thursday, August 14, 2014

6 Modern Eclectic Ways To Think Outside The Frame

Kilim Rug Low Pile Wall Decor
I'm always on the hunt for new ways to incorporate natural elements into our home and onto our walls. I love framed art, but too much of one thing takes away from the beauty and intentionality of that item. Varying the types of items you hang allows each piece to stand out and hold court on its own. Here are the six modern eclectic wall decor items I'm digging lately.

Above: Kilim rugs combine beautiful rich colors with geometric patterns and always add eclectic character to a space. Since they're low pile, they look lovely on walls. 
Straw Hats as Wall Decor Driftwood
Above: This space is so artful, unique and functional with its display of straw hats. Using a bleached piece of driftwood, as seen in the styling above, created a beautiful bending shape and I love the driftwood peeking through the hats. Washi Tape Wall Decor DIY
I love washi tape for many reasons, and uses, but wall decor is one of my favorite. The options for creativity are endless and temporary, making it the perfect option for apartments or dorms. This example of black crosses is modern yet playful and a fun idea for a child's playroom. 

See the rest of the list after the jump!
Woven Baskets Wall Decor Natural Modern
Above: Woven baskets are always a good idea. And I particularly dig this use of baskets on walls of varying dimensions to bring the space together. Bentwood Art Wall Decor West Elm
Above: This bentwood structural art piece from West Elm is unique and dramatic, which would be perfect for a room with high ceilings, but is simple enough in design that it won't overwhelm a space. 
Macrame Tapestry Fiber Art Wall Decor CB2
Above: Tapestries and fiber art is back in a big way and this pretty little macrame number from CB2 is quite nice. Again, unique and dramatic but not overly attention seeking. 

Monday, July 14, 2014

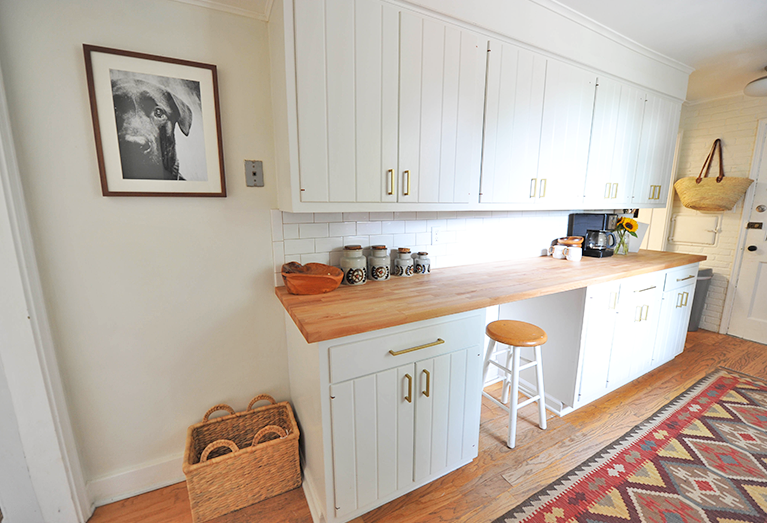
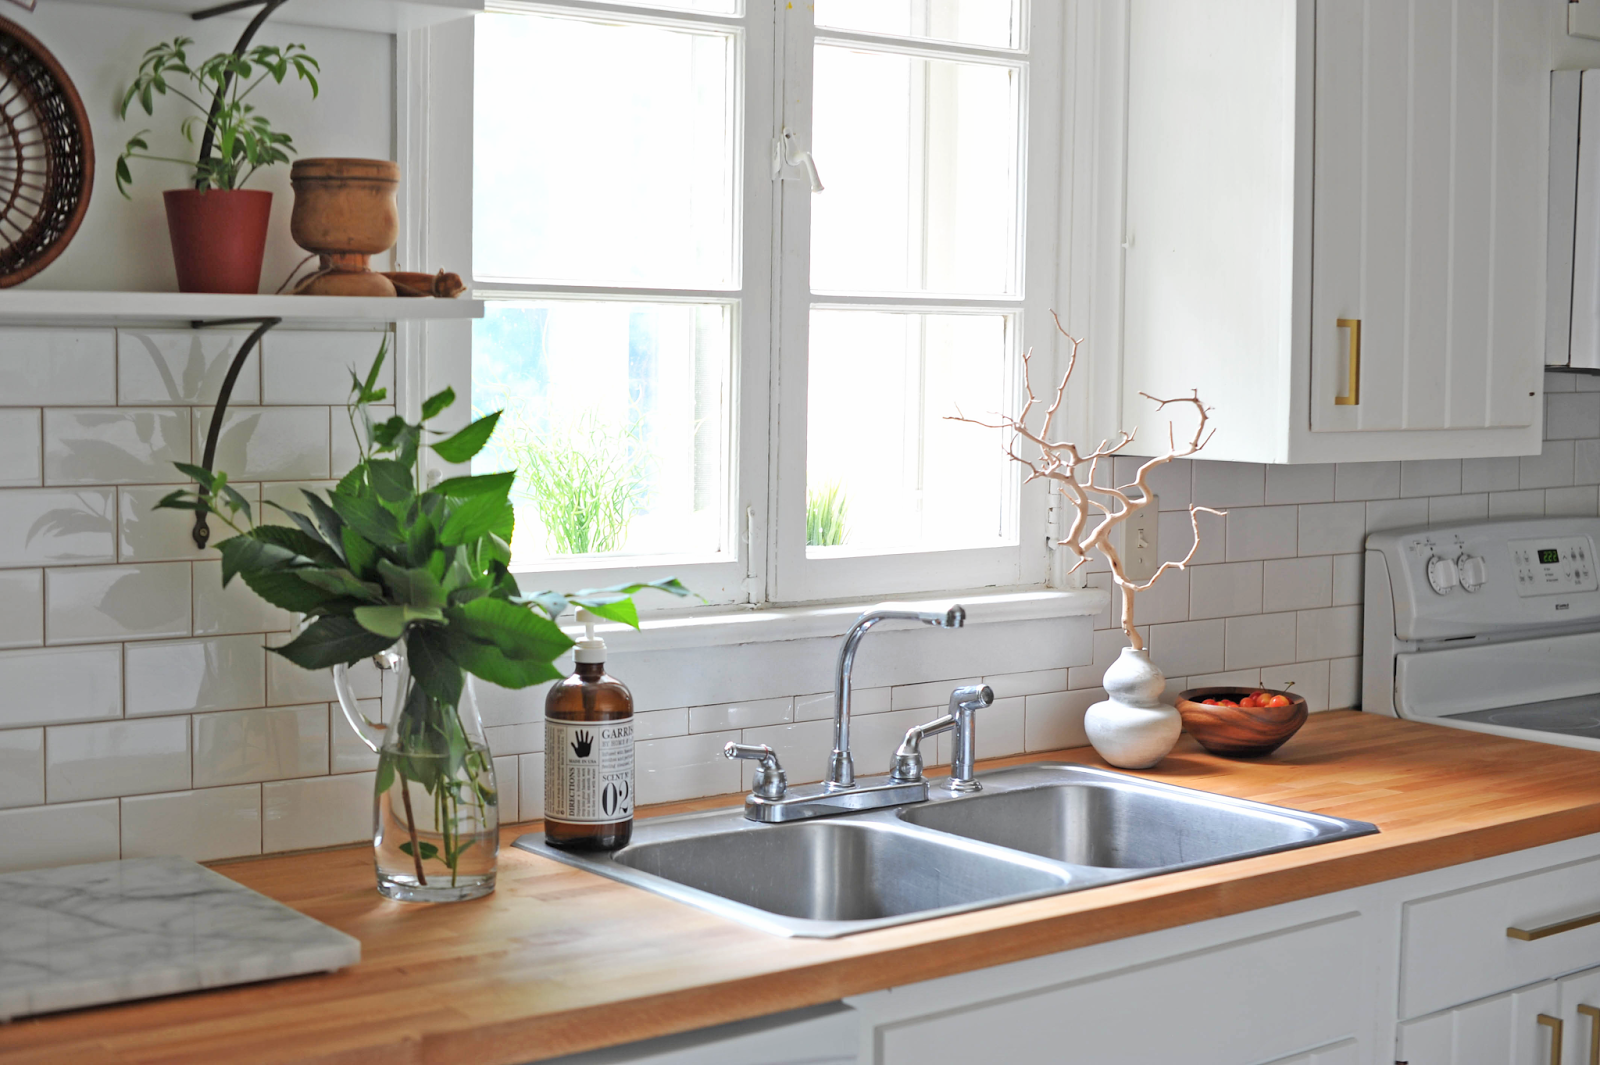
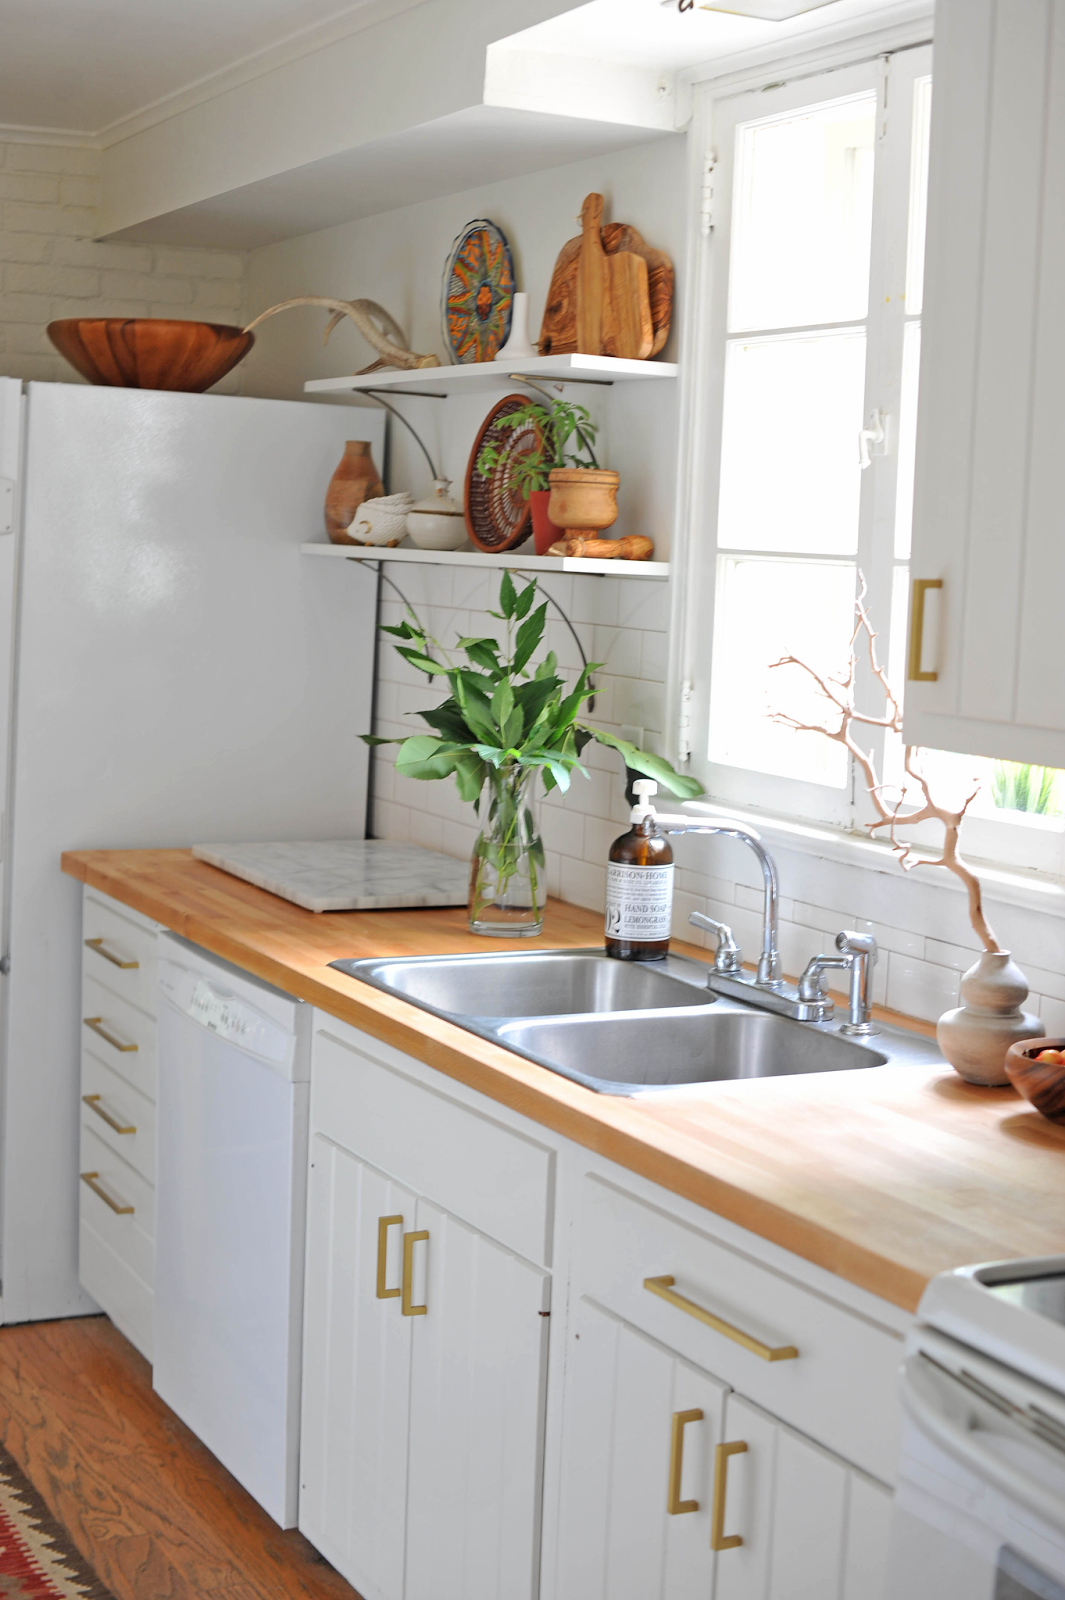
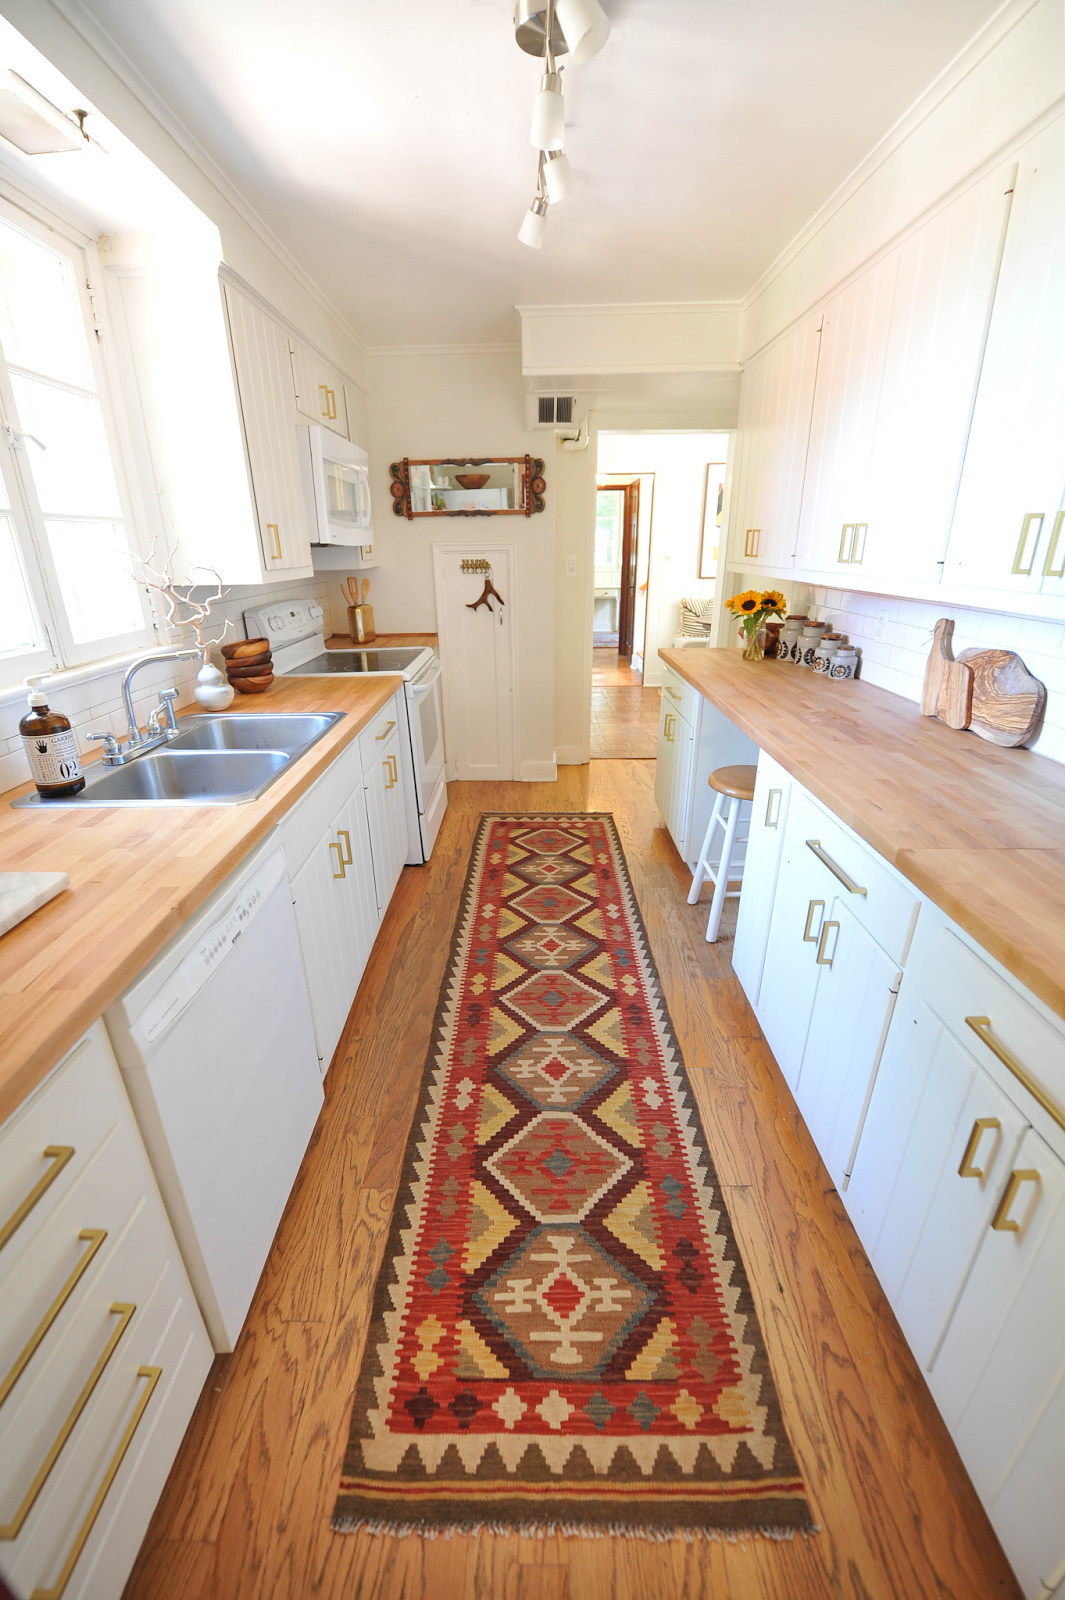
THE KITCHEN

Modern White Eclectic Kitchen DIY Renovation ntropologie bracket Butcher block countertop

Modern White Eclectic Kitchen DIY Renovation Kilim Rug Butcher block countertop

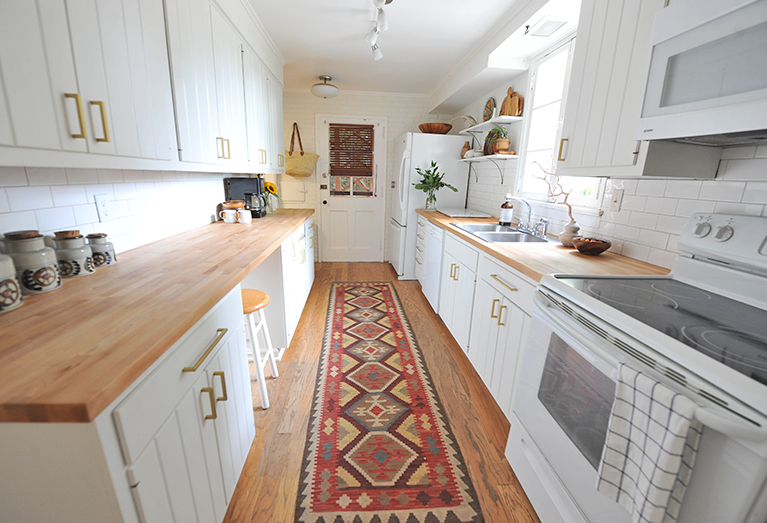
The day is finally here! I am so excited to share our kitchen. It has been a LONG time coming and this project felt, at times, as if we tackled more than we could handle. All of the work of this remodel was done by Rich, myself and gracious friends and family willing to lend expertise and muscle. Despite its challenges, we finished. And all of the blood, sweat and tears (yes, literally) were worth it because we ADORE this space.

Here's the before shot of our kitchen. The photo quality isn't great, but they are the most forgiving and appealing photos I could track down. I don't need to explain the cons of our previous kitchen, but our main issues were the fluorescent lighting, dark wood cabinetry, beat up/burnt laminate countertops, butter yellow brick accent wall, and fake brick as backsplash. I also had a hard time with all the upper cabinetry. Since it's a galley kitchen layout, I didn't have anywhere to do all of my food prep, so some of the upper cabinets had to go to give it a more open feel with additional work space.

Modern White Eclectic Kitchen DIY Renovation Before and After

Modern White Eclectic Kitchen DIY Renovation Before and After Kilim Rug Butcher block countertop

And in case you missed that...
  Modern White Eclectic Kitchen DIY Renovation Before and After
DIY Modern Kitchen renovation before and after subway tile
See our full kitchen reveal after the jump!

DIY Modern White Eclectic Kitchen DIY Renovation Before and After

DIY Modern White Eclectic Kitchen DIY Renovation Before and After

DIY Modern White Eclectic Kitchen DIY Renovation Before and After kilim rug

DIY Modern White Eclectic Kitchen DIY Renovation Before and After wood

Modern White Eclectic Kitchen DIY Renovation Before and After IKEA butcher block countertop

Refinishing the cabinetry was, by far, the most labor intensive part of this remodel. We wanted to keep the original cabinets because they are a great brand, Wood-Mode, and the wood itself was in good condition. Plus, I dig the cabinet style as it mimicks the white paneled look we have throughout the rest of the house. So we broke out the white paint. 

The process included cleaning, deglossing, and sanding (using multiple grits) until they were smooth. Then we primed using Zinsser Shellac primer. We have painted a TON of wood in our house, and believe me when I say this is the only primer that worked for us (water based just didn't get the job done). We painted them using 2-3 coats of CabinetCoat in White Dove. This product is amazing and worth every penny. This self-leveling paint has a protective enamel coating, so even with Scout regularly nose-diving for food scraps, our cabinets don't have a single chip and look like a professional job. 

DIY Modern White Eclectic Kitchen DIY Renovation Before and After basket dog

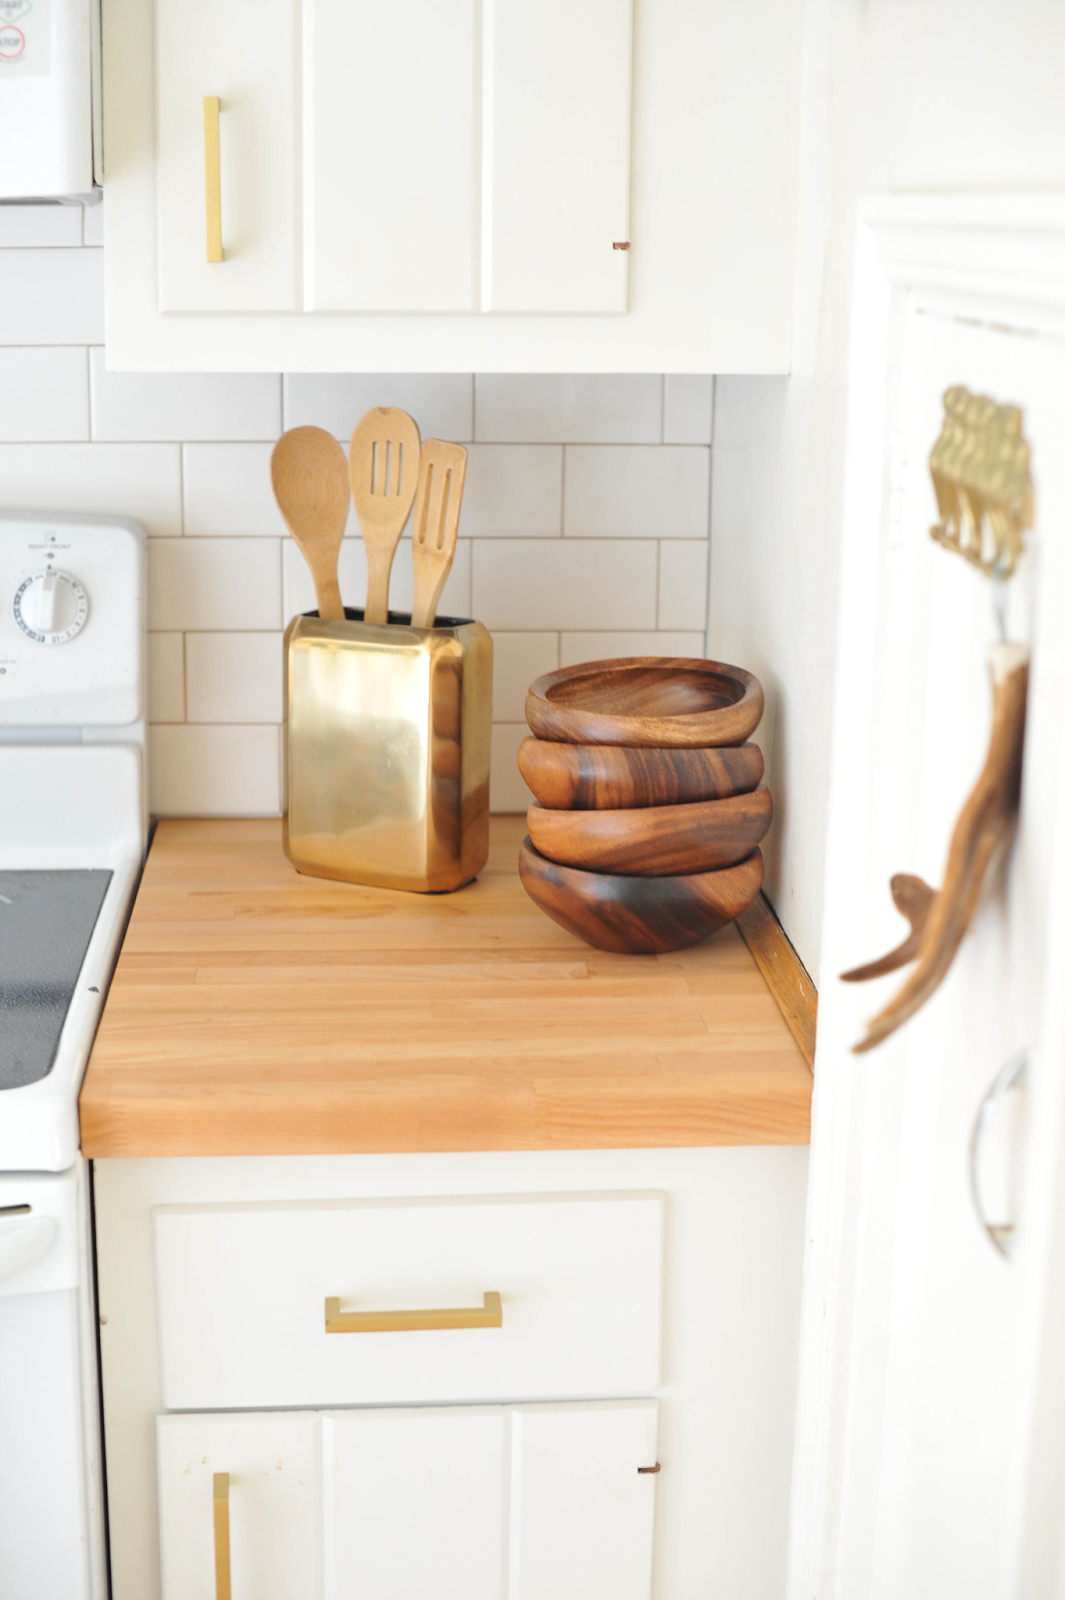
The countertops are IKEA's Numerar butcher block in beech. We needed three 73 inch pieces, and had some leftover that we made into cutting boards. We were worried about care and maintenance of unsealed butcher block, but it has held up beautifully with regular use of mineral oil.

Modern White Eclectic Kitchen DIY Renovation Before and After Anthropologie Bracket

Modern White Eclectic Kitchen DIY Renovation Before and After IKEA butcher block countertop


Modern White Eclectic Kitchen DIY Renovation Before and After IKEA Numerar Butcher block countertop

Our kilim runner rug is one of my favorite parts of the kitchen. I have kilim rugs all over the house and just can't get enough of them. It brings much-needed color into the space and their low pile quality holds up to high foot traffic. I snagged it almost a year ago, and even though it's a one of a kind pattern, you can still find plenty like it online. 

Modern White Eclectic Kitchen DIY Renovation Before and After Kilim runner

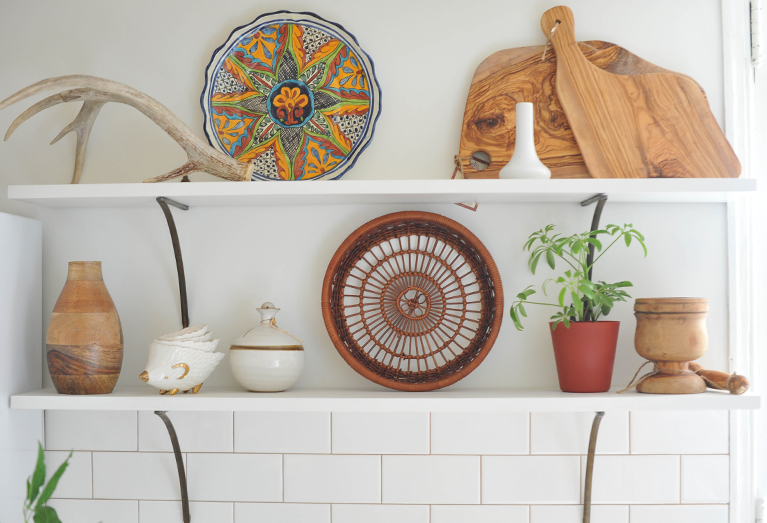
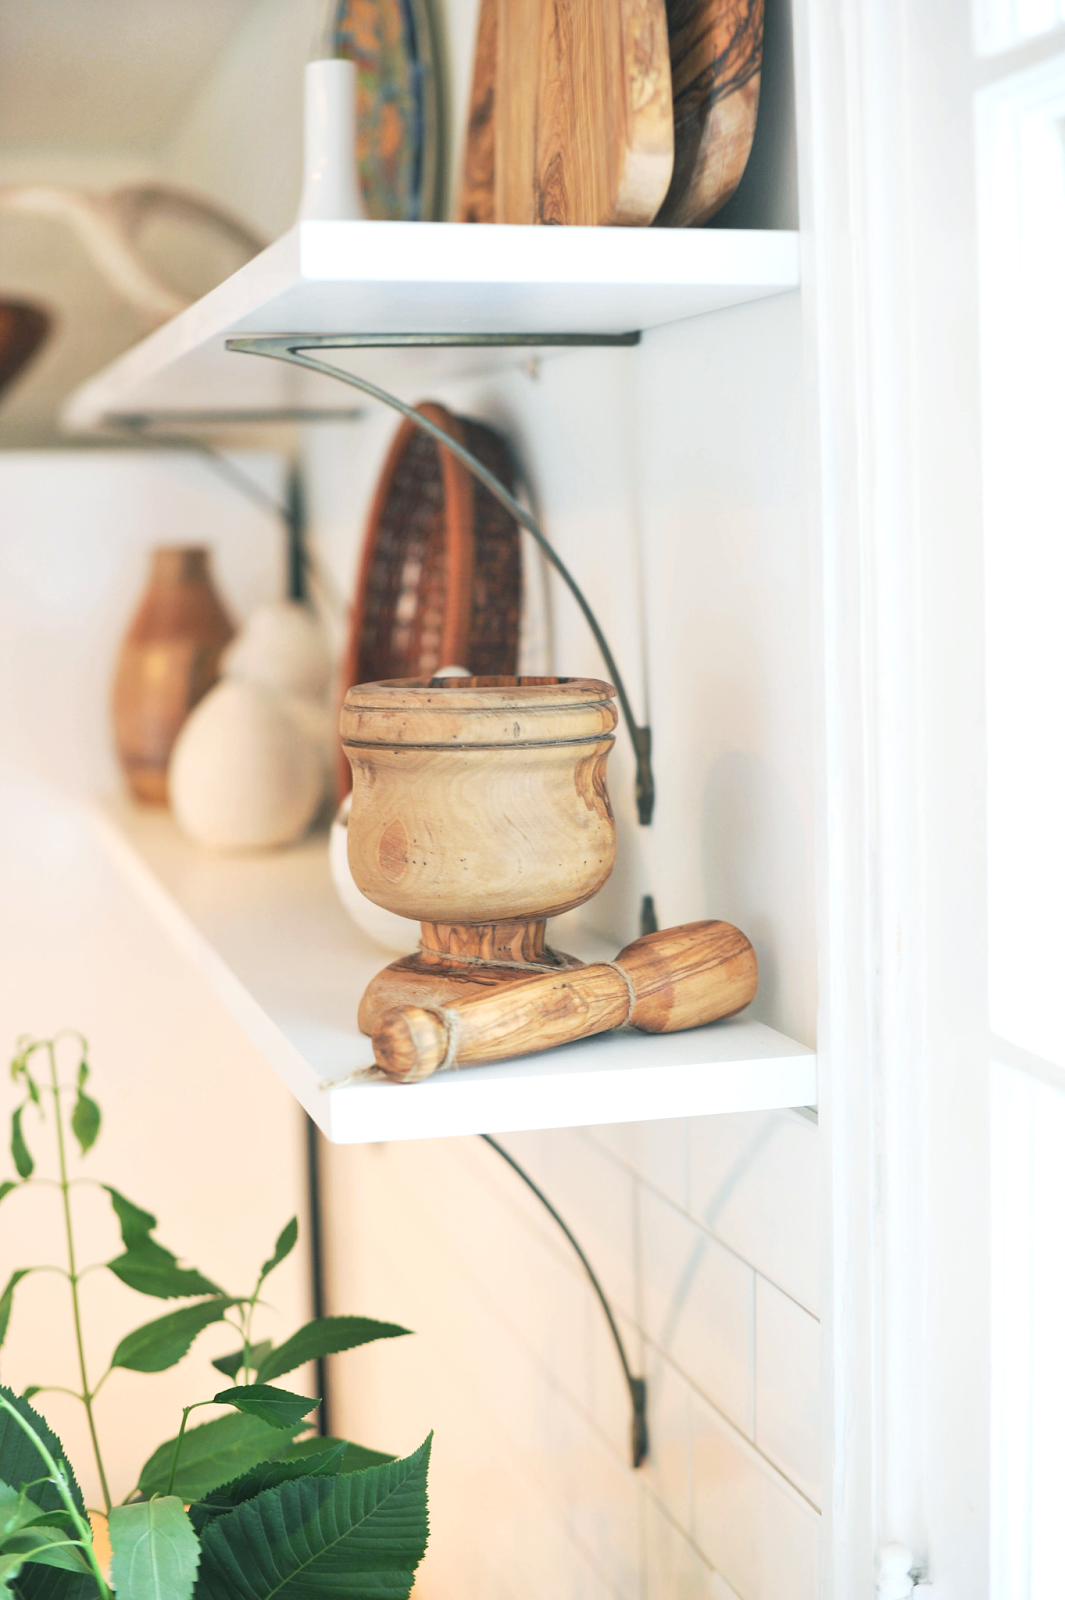
Our entire remodel was extremely budget conscious, but when it came to picking brackets for the open shelving, Rich and I both felt like we couldn't skimp on hardware. We spent a good week researching open shelving designs and chose the brass wishbone brackets from Anthropologie. They matched the gold/brass cabinet pulls and have a sleek look from all angles. For the horizontal shelf, we bought a 1x8 board that we cut in half and primed/painted them using the exact same materials as the cabinets. 

Modern White Eclectic Kitchen DIY Renovation Before and After Anthropologie Bracket Hardware

White subway tile is paired with a brown-gold grout. Rich and I tested at least four different grout colors with the white tile before choosing this. It may just be that we are perfectionist color freaks, but picking a grout color other than black or white was tough. We landed on the color Haystack by Polyblend. I've heard some complaints about this grout bubbling, but it worked like a charm for us.

Listen up, my advice is to test a small section of tile before committing to the whole area. Use a hair dryer to quick-dry the spot to be sure you love the color. The amount of light you have in your kitchen and the color of tile you choose will make each grout color look very different. 

Modern White Eclectic Kitchen DIY Renovation Before and After Gold Spray paint hardware

Modern White Eclectic Kitchen DIY Renovation Before and After Shelf arrangement

Modern White Eclectic Kitchen DIY Renovation Before and After natural wood
SOURCES: Cabinet Pulls: IKEA. Cabinet Pull Spray Paint: KRYLON, Countertops: IKEA, Cabinet Paint: CABINETCOAT in White Dove, Subway Tile: LOWES, Grout: POLYBLEND in Haystack, Open Shelf Brackets: ANTHROPOLOGIE Cabinet: Marble Pastry Slab: CRATE & BARREL, Lighting: IKEA, Kilim Runner Rug: OVERSTOCK, Wall Color: BENJAMIN MOORE SIMPLY WHITE

Are you thinking about doing a kitchen remodel? Have you done one recently? Ask any questions or tell me about your own experience in the comments!
{next house reveal: the breakfast nook!}

*We recently updated our kitchen's outlets and switches and the "before and after" is pretty dramatic.