Showing posts with label crafts. Show all posts

Monday, July 6, 2015

DIY Modern Wood Keyholder

DIY Modern Wood Key Holder Tutorial

When I'm running out of the house, my last thoughts are usually, "Where are my keys?" and/or "Where the heck is my cell phone?" I'm always wishing I had a designated place for this stuff instead of frantically retracing my steps. I'm not sure how to keep better track of my phone (anyone have tips for this?) but I knew the key problem could be solved with an entryway key holder. Now I just need to train myself to actually hang my keys there. 

Anyways, I have been OBSESSED with Boila's CatchMe keyholder for quite some time, but it can only be purchased in-store. And while I'd love any excuse to travel to Sweden or Denmark, it's just not in the cards right now. So Rich and I took on the task of making one. See the full DIY tutorial after the jump!

DIY Modern Wood Key Holder
DIY Modern Wood Key Holder Tutorial

Here's what you'll need:

Unfinished wood craft balls (I used 3 1 1/2" balls and 3 1")
Suede leather craft lace (I used the color Toast)
Two keyhole fasteners
Key chains

To begin, cut the stair tread down to 9 5/8" X 1 1/2", keeping the rounded wood edge. 

DIY Modern Wood Key Holder Tutorial

Lay out the wood craft balls in the order you want them to line up. Mark the lines for cutting. You can see our line up below and the space in between each. 

DIY Modern Wood Key Holder Tutorial

Using a miter saw, make a cut approx. 2 inches deep. 

DIY Modern Wood Key Holder Tutorial

Then, using a quarter inch straight bit, rout two recesses for hanging your hardware.

DIY Modern Wood Key Holder Tutorial

Screw in the keyhole fasteners.

DIY Modern Wood Key Holder Tutorial

Measure and cut the suede lace, I made mine approx. 8 inches long, but I highly suggest trying them out on the keyholder before knotting. Loop the lace through the wood balls and tie the ends with the key rings attached. You can attach this to another keychain, or use it solo.

DIY Modern Wood Key Holder Tutorial

Hang everything up in the wall, attach your keys and you're done! 

DIY Modern Wood Key Holder Tutorial


Sunday, February 8, 2015

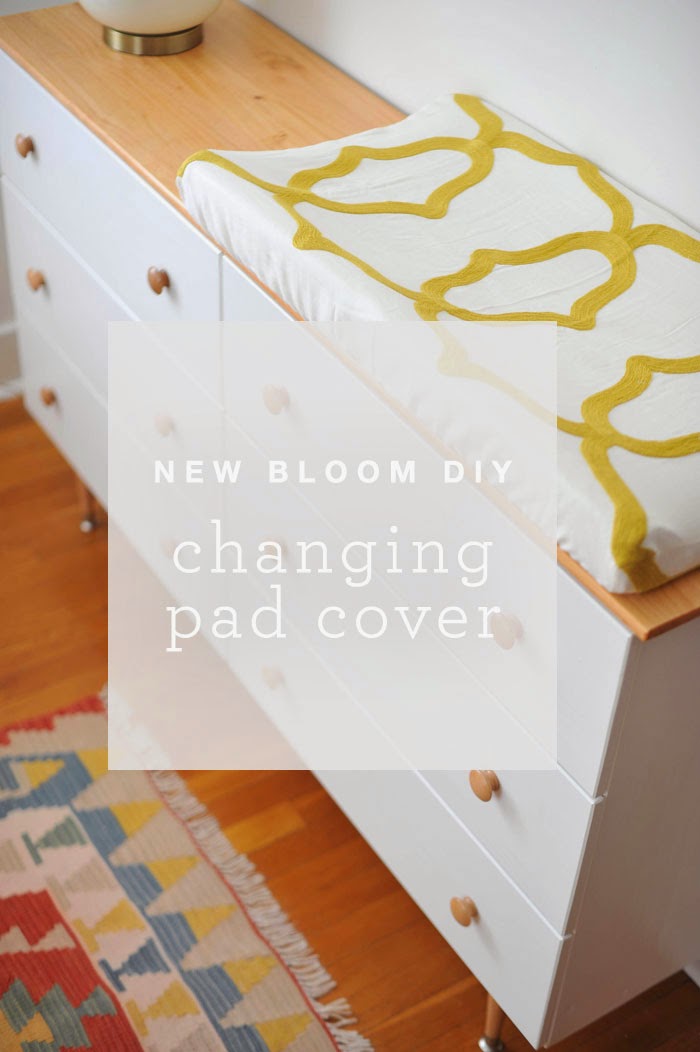
DIY Changing Pad Cover

DIY Modern Boho Changing Pad Cover Tutorial

My DIY inspiration usually arises after trying to take on a new project, looking high and low for good tutorials, and having a hard time finding what I'm looking for. At that point, I'll just wing it. And if the project turns out well, I share it with you all.

Putting together our little one's nursery has been one of my favorite projects to date. I've really loved exploring new colorful decor styles and incorporate a soft feminine vibe into the space without going over-the-top girly. I couldn't find a changing pad cover for sale that had the modern boho vibe I'm going for. So when I came across embroidered mustard yellow curtain panels on clearance at Target, I thought it may look awesome on a changing pad. Here's how I did it...

If you're using a curtain panel, trim off the extra fabric (you'll have a lot, so you can definitely repurpose it for another project). I measured the width to be around 40". 
DIY Modern Boho Changing Pad Cover Tutorial Sewing

Measure the length of the changing pad and give 1-2" of allowance for seams. Pin the edges and cut a straight line, trying to keep the cut as clean as possible. It's okay if it's not perfect, you're going to sew these edges back together anyways. 

DIY Modern Boho Changing Pad Cover Tutorial Sewing

Trace the contoured side pieces of the pad on a manilla folder and allow for 1" seam and 5" extra fabric on the bottom. Cut out the two pieces of fabric you just trimmed from the main piece of fabric with the folder pattern.

DIY Modern Boho Changing Pad Cover Tutorial Sewing

With the fabric turned inside out, pin the two contoured pieces of fabric together, leaving a 1-2" seam for sewing.

DIY Modern Boho Changing Pad Cover Tutorial Sewing

After sewing the contoured pieces and the main fabric together, pin the bottom raw edges. Allow for 1.5" seam so you can slide the elastic piece through easily and don't close the seam as you'll need a small section to insert the band.

DIY Modern Boho Changing Pad Cover Tutorial Sewing

Slide the elastic through the finished edges. Sew the elastic together and finish sewing the bottom edge. And there you have it, put your beautiful new cover on the changing pad and you're good to go. Our next step is figuring out how to safely secure the changing pad to the dresser. 

DIY Modern Boho Changing Pad Cover Tutorial Sewing

WHAT YOU'LL NEED:
Curtain panel or 1.5 yard of fabric (I used this Threshold panel)
~2 yards of 3/4 inch. elastic
Sewing machine
Coordinating thread (I just used standard white)

The nursery still needs work, but I'm really happy with how it's coming together and can't wait to show you the nursery reveal soon. 

Sunday, July 6, 2014

DIY Modern Wood, Marble and Gold Necklace

When it comes to jewelry, I'm drawn to a minimal and simple approach. I love golds, geometric shapes, clean lines and natural materials. Often times I'll get an image in my mind of something specific, like a necklace, and search high and low for it to no avail. Then I'll just try to make it myself. Like so.

DIY Gold Wood Marble Modern Necklace Tutorial

See how to make this necklace after the jump!

DIY Gold Wood Marble Modern Necklace Tutorial
DIY Gold Wood Marble Modern Necklace Tutorial 
DIY Gold Wood Marble Modern Necklace Tutorial

What you'll need:

Twine or white waxed linen cord
Marbled stone beads in a natural finish
Brass tube spacers
Brass faceted cube beads
Unfinished round wood beads
Gold toggle clasps

String it together like the example above or play around and do your own thing. I like the idea of using more brass tube spacers to increase the gold, or incorporate more unfinished round wood beads.

Sunday, April 27, 2014

DIY Horizontal Plank Wall

The first floor of our house is filled with wood planked walls. We've painted some plank walls white and others remain untouched, but I'm growing more and more fond of the white plank wall look and wanted to bring some of that texture to the second floor of our house. Switching it up with a horizontal paneled look seemed perfect for an accent wall. See the how-to below.


Materials (for a 8x5 ft. wall)

Two unfinished 4x8 ft. hardboard wall panels, cut into 5" horizontal pieces
Nail Gun
Finishing nails
Zinsser B-I-N Shellac-Base Primer
Benjamin Moore paint in Simply White

Instructions

Measure your walls to get an idea of how many panels you will need. If any sections of your wall are longer than 8 ft., you'll have seams. Go to your local hardware store and snag a few unfinished 4x8 ft. hardboard wall panels. They are usually under $10 a piece. Utilize the in-store wood cutting service and kindly ask them to rip the boards length-wise into 5-inch strips.

Using a circular saw, cut your panels according to the width of the wall, and begin placing the boards horizontally starting the top of the wall, working your way down. Using a nail gun, put a 3/4 inch finishing nail at either end of the board and one in the center. After you've nailed all of the boards to the wall, start priming using a shellac-based primer. It dries very quickly, and you will only need two coats for full coverage. Make sure to use an old, or cheap, brush with the primer. Once the primer is dry, put on a coat of the white paint.

Sunday, November 4, 2012

Almond Butters that will rock your world


Almond Buttah


Hi-o friends. I hope you're staying warm and happy this early November. I've been enjoying the company of my family and spending lots of time at in our new Shadyside neighborhood. The gift of a food processor (thanks, mom and dad!) has led to many homemade butter experiments. Almond butter, more specifically.

We tried a Candied Ginger and Honey combination.


Honey Ginger Almond Butter

And then we tried a Mexican Dark Chocolate, with cayenne and chili powder. YUM.

Mexican Chocolate Almond Butter

And lastly, our favorite, a Curry and Toasted Flaked Coconut. Do not knock until you try it, folks.

Coconut Curry Almond Butter

I'll be processing all these lovelies all winter long, so please make a suggestion if you have a great combination in mind.

Almond Butter can tops

We painted the tops of these Ball jars with chalkboard paint to serve as a temporary label. It makes a cute gift. And this batch went to Rich's rad sister Trish in New Orleans, because she is just awesome and we miss and love her :)

Almond Butter Base Recipe
4-6 ounces raw almonds
1 teaspoon walnut or almond oil (optional)
Food processor

Preheat oven to 350 degrees. Place 4-6 ounces of raw almonds on baking sheet lined with parchment paper and roast almonds 12-15 minutes, turning every couple of minutes. Let almonds cool a few minutes. Place roasted almonds in food processor for 10-15 minutes, scraping down the sides every so often. If, after about 10 minutes, your mixture is still looking dry, feel free to add about a teaspoon of walnut or almond oil. Continue mixing until smooth texture is achieved. Let almond butter mixture cool a bit before adding your additions (especially chocolate). 

Monday, February 6, 2012

An Illustration & DIY Frame

This was my parent's Christmas present. The graphite illustration is a Rich Kelly original :) It's a scene from the movie, "It's a Wonderful Life," my dad's all-time favorite.

In addition to the beautiful illustration, Rich handcrafted the frame with reclaimed gymnasium flooring from our local architectural salvage group Philadelphia Salvage. They have the coolest materials and we love wandering through their Mt Airy store.

DSC_8753

Building the frame out of gymnasium flooring was intentional and complimented Rich's illustration perfectly.

In the movie, George Bailey and Mary Hatch meet and dance the Charleston together on a retractable gymnasium floor. While dancing, prankster Freddie opens the gym floor, prompting George and Mary to fall in the swimming pool but continue dancing and eventually draw the entire crowd into the pool. It's a pivotal and lighthearted scene, as well as the catalyst for George Bailey's life to begin.


DSC_8756

DSC_8761

DSC_8757

And this is the piece's resting place in my parents' new home...

DSC_8829_2

Tuesday, January 31, 2012

A Guide to Pittsburgh (in Flipbook form)

This weekend, Pittsburgh will welcome two rad new residents. My dear friend Jessica and her hubby Doug are moving from East to West across Pennsylvania to start their new life in the Burgh.

As someone who has city-hopped over the last couple years, I was excited to share some of my favorite Pittsburgh spots with them in the form of a flip-book to make their transition a little smoother.


DSC_8897_2
Photobucket

By Neighborhood

Oakland
Lulu's Noodles
Caliban Used Books
Phipps Conservatory and Botanical Gardens
Carnegie Museums (especially the dinos at the Natural History!)

Waterfront
Pre-order a dozen of Nancy B's chocolate chip cookies and prepare to eat the BEST cookies of your life

Oakmont
Oakmont Bakery
BrrKee's Ice Cream (get a scoop of Kahlua flavor)
Walk along the train tracks

Point Breeze
East End Brewery for the Growler hours
East End Food Co-op
Point Brugge Cafe for mussels and frites
The Cafe at the Frick for brunch or tea

Squirrel Hill
Gullifty's a Pittsburgh dessert staple
Bankok Balcony yummy tofu curry
Aiello's Pizza my brother Taylor, a pizza guru, swears it's the best

Shadyside
MCN Salon for a pampering cut & color
Girasole for a romantic date night
Oh Yeah! Ice Cream for a yummy scoop (dog friendly!)
Amazing Yoga for sweats and stretches

Regent Square
D's 6 Pax for hot dogs and the beer cave
Ambiance Boutique thrift
Square Cafe for brunch
Regent Square Theater for an indie flick

South Side
Drink some beer at Fat Head's Saloon
Frequent the following restaurants: Dish Osteria, Cafe du Jour and Nakama (get the sushi)
Big Dog Coffee for a spritzer and cup o' joe with your pup

Downtown & the Strip
Roxanne's Dried Flowers
Primanti's, Pamela's Diner and Enrico Biscotti
Take a walk around and under the Convention Center
Kayak ride at PNC Park

East Liberty
Kelly-Strayhorn Theater
Conflict Kitchen & The Waffle Shop
Paris 66

*(I should have added Lawrenceville to the book)

Lawrenceville
Piccolo Forno for amazing flatbread - BYOB
WildCard for hipster goodies (think a glorified Paper Source with a Pittsburgh flair)

Monday, November 14, 2011

Starting to Deck the Halls

Each year around the holidays, my mom transforms our home in Pittsburgh into a warm, rustic, ribbon-and-raffia-flowing wonderland. It feels warm and all-encompassing in the most welcoming and festive way.

DSC_4890

This year I'll be in my Philadelphia home for a majority of the holidays, so I'm embarking on creating some my own holiday decorations to spark the spirit. The first of the season are Orange-Clove Pomanders.

DSC_4894

Grab between six and eight oranges and a bag full of whole cloves. Take their general color, shape and sturdiness into consideration (i.e. the cloves are actually whole and the oranges are round and unbruised).

DSC_4864

Plan out your designs and begin sticking the cloves directly into the oranges. Try to avoid putting too much pressure directly on the top of the cloves. You can use a toothpick to create holes beforehand if you prefer.

As you go along, pause every once in a while and smell the aromas the skin on your fingers takes on. It's better than any hand lotion you'll ever find in a store.


DSC_4912

After all of the cloves are inserted, roll in a mixture of spices (I used cinnamon, cloves, ginger and ginger). Then set aside for a few weeks until completely dry. Once dry, you can use as an ornament on a Pine, Wreath or Garland.